Basics
You can now store files in the cloud (rather than locally). What to take advantage of this super-handy feature? You only need one thing: an Azure account
Configuration
Azure
- In Azure, configure a Storage Account. The Storage Account needs to have an Account Kind of "Storage V2." Check out this storage account overview for more information.
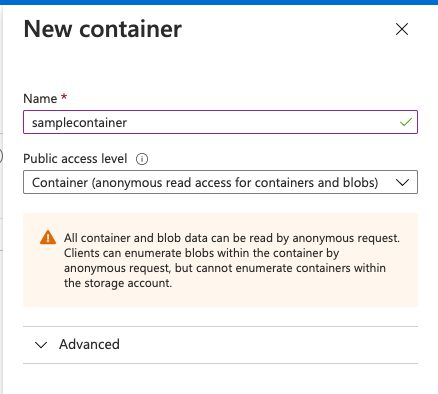
- Within your Storage Account, configure a Container with your desired church-y name and Access Level "Container."
- Configure your Shared Access Signature
- Signing Method: Account Key
- Signing Key: Key 1
- Permissions: Check all
- Start Date: Configuration date
- Expiry: Choose some date in the distant future (for example, five years from the configuration date)
- Allowed Protocols: HTTPS only
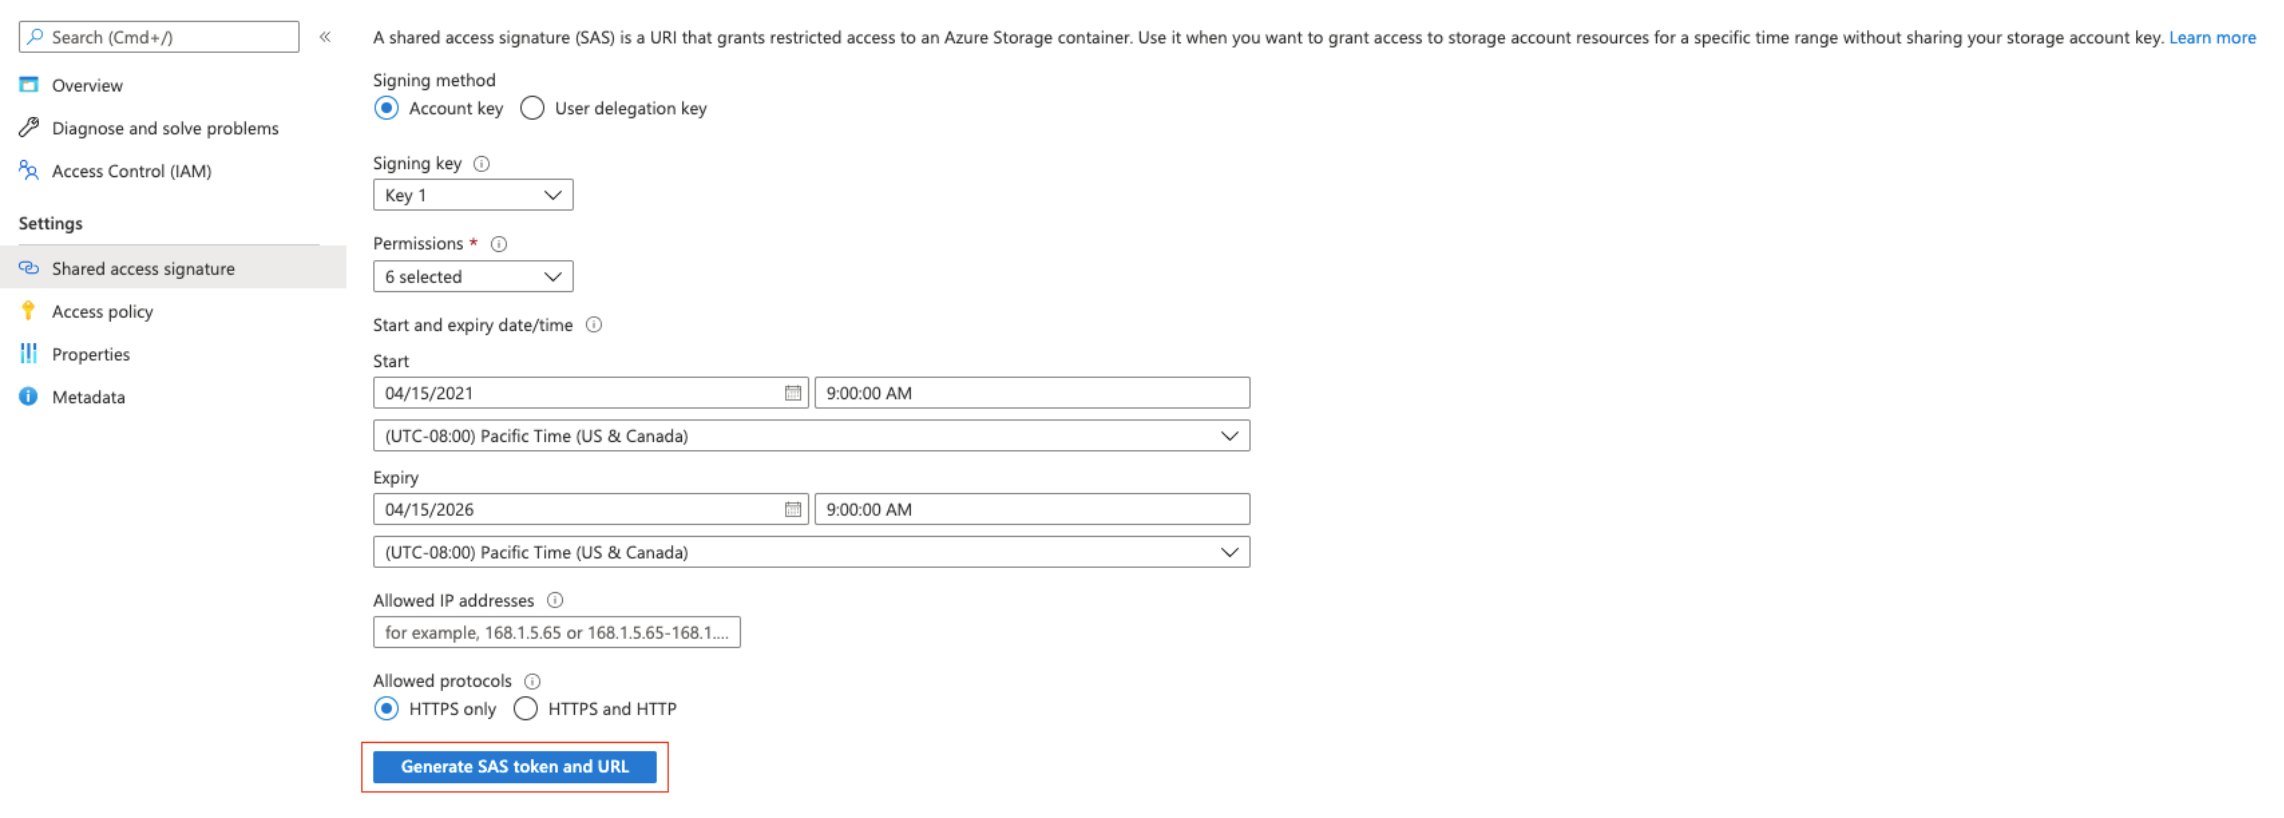
- Click "Generate SAS token and URL," then use the icon to copy the generated value
Domain
- File Provider: "Microsoft Azure BLOB Storage"
- File Provider Settings: Shared Access Signature value that you copied from Azure
Migration
After configuring your Domain, current local files can be migrated using a utility. Note: The utility requires access to a server, so this storage option is recommended for self-hosted customers. In addition to server access, migration requires some configuration. Follow the steps below to complete your own migration. Or engage Professional Services to do the migration for you. (Note: Migration is a one-off effort and coaches will not be available for consult.)
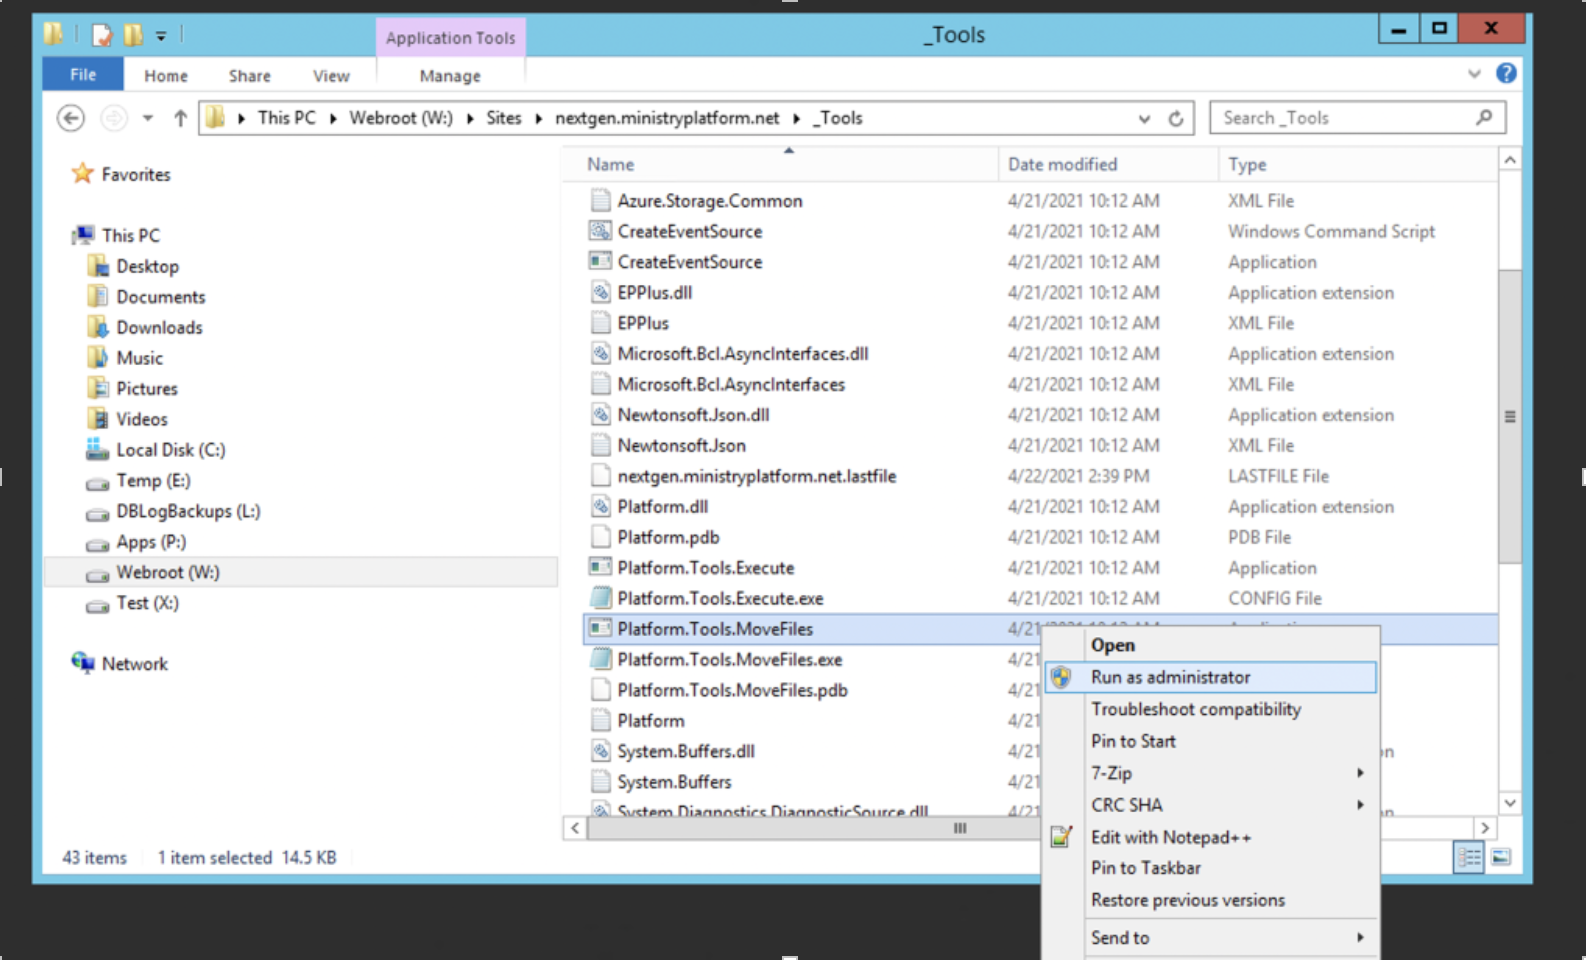
Ready to go it alone? This utility (and related files) can be found under the_Tools folder:
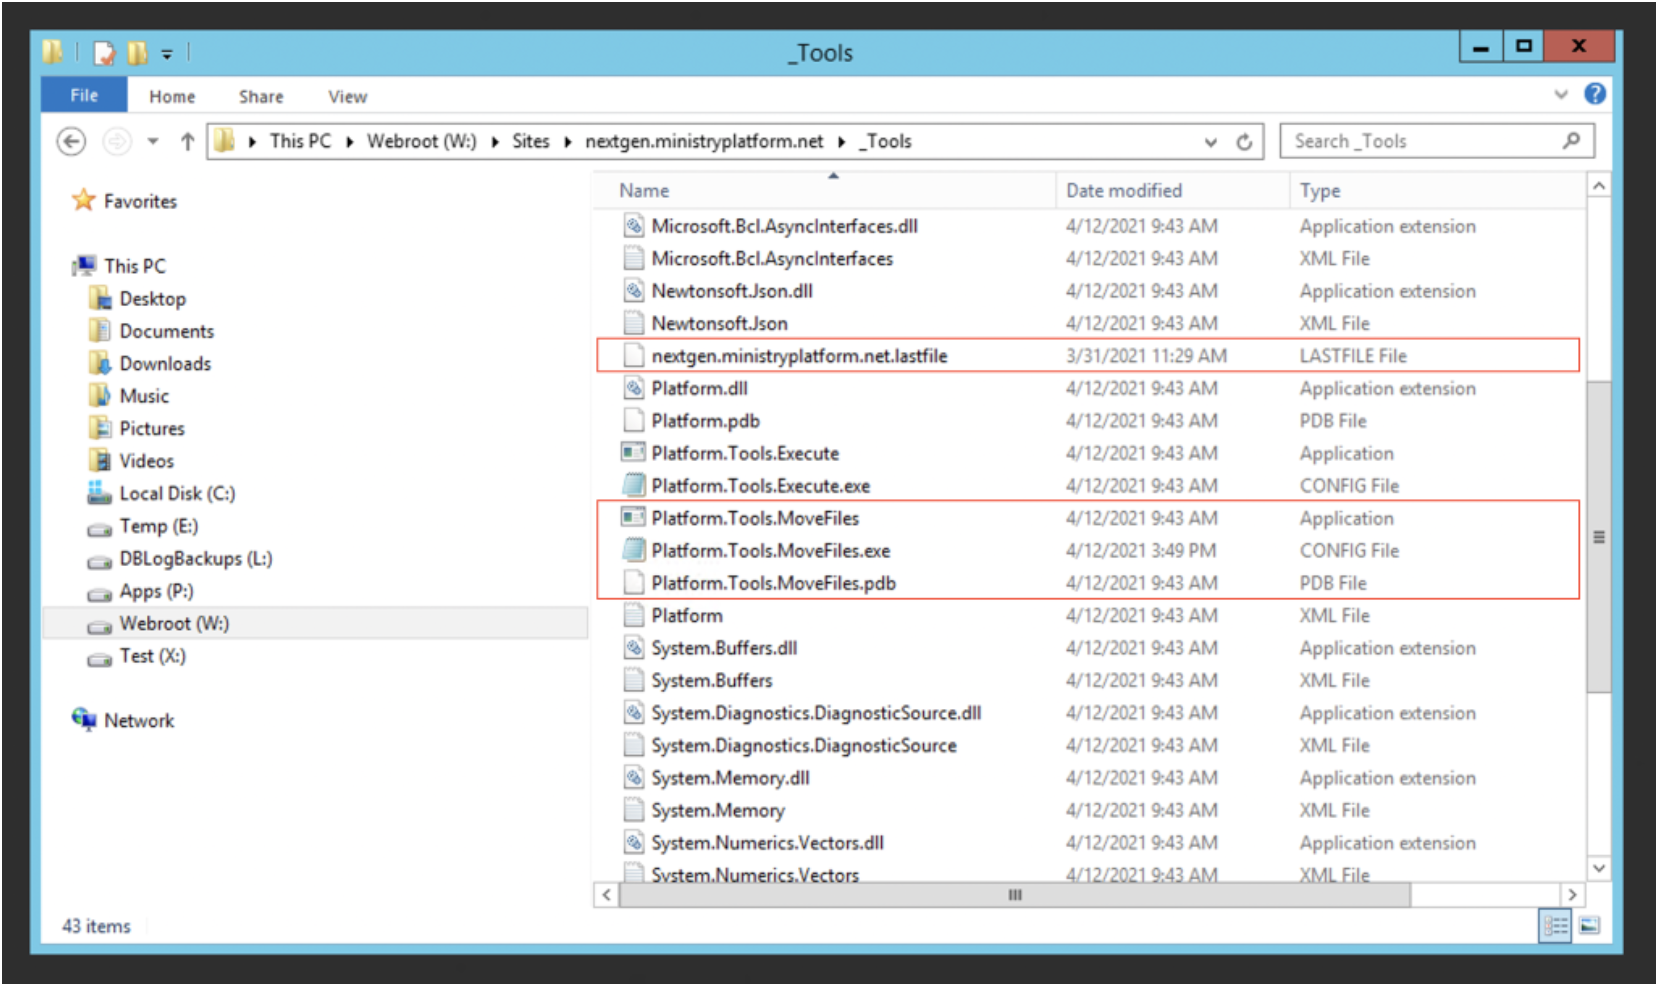
Prior to executing the utility, four key values must be set in the "Platform.Tools.MoveFiles.ex" CONFIG file.
- DomainHostName: Source value from Domain "Internal Server Name."
- FileStorage: Set during deployment. If needed, reference Web.CONFIG.
- Encryption: Set during deployment. If needed, reference Web.CONFIG.
- BlobContainerUri: Source value from Domain "File Provider Settings." This should be the Azure Container's Shared Access Signature you previously copied.
Note: Inside the CONFIG file, all ampersands in the Shared Access Signature must changed from "&" to "&" for the utility to run successfully. If you skip this step, the utility will not run and you'll get an error message.
Saving changes to a CONFIG file may require launching an application (such as Notepad) as an Administrator. This can be accomplished by right-clicking the application during launch.
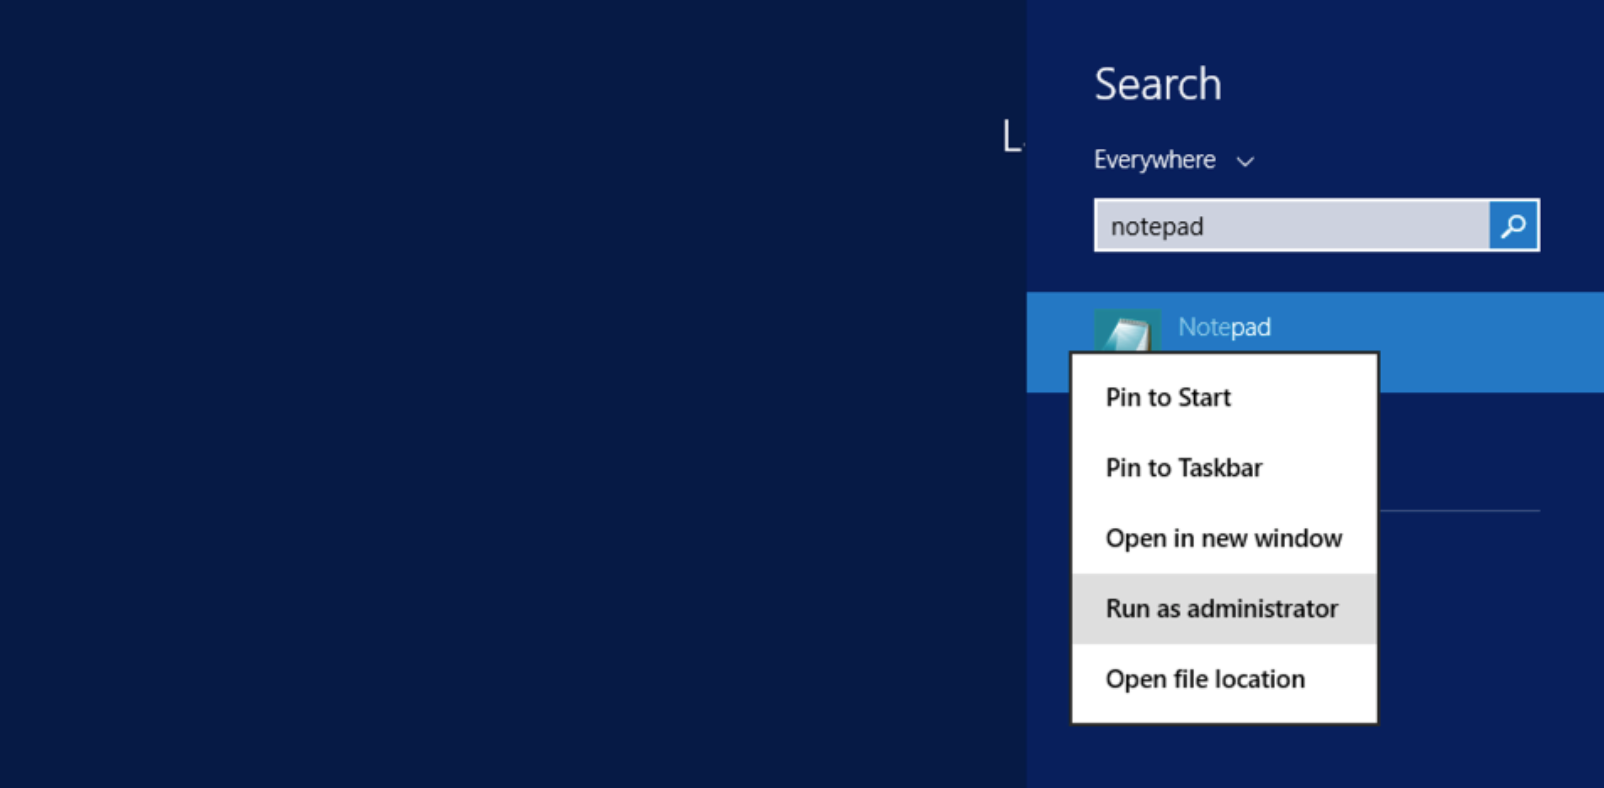
To run the utility, right-click the Application and choose "Run as Administrator."
Important! If you do not take this step, any stops during migration will not be saved. Duplicate files won't appear, but the migration will start over from the beginning.
After the migration is complete, be sure to clear the application cache from the About dialogue. This will help with any previews that were cached to the old location.
Pro Tips
- Migration can be stopped at any point using Ctrl+Z or Command+Z. The last processed file will be saved and the utility will resume from this point the next time it is launched.
- Any files added during migration (or at any point after the Domain has been configure for Azure) will immediately appear in Azure.
- Depending on your church's unique storage needs, migration may take several days. It might be wise to let your staff know that previewing files will not work until a file has been migrated.
