Basics
- Tasks are used to notify users of a data change, seek approval for a data change or request that a user take action.
- Tasks can be assigned automatically through a Process, or manually through the New Task functionality.
- The task status indicator of a record that has an outstanding Task is yellow (rather than its usual green). Once the Task is completed, the yellow light returns to green.
- There are three types of tasks: stand-alone, record-related, and workflow-generated:
- Stand-alone tasks are those that are not related to a record or a workflow in the MinistryPlatform system. They can be created by a user for themselves, or for another user.
- Record-related tasks are those that can be created by a user but are related to a record in the database. Associating a task to a record saves everyone involved time and effort by keeping the information linked together in one ‘place’.
- Workflow-generated tasks cannot be created by users. When workflows are made in the MinistryPlatform system, certain tasks are added in a specific order. When the workflow process is started, the first task is automatically sent to the assigned user. When that user marks the task complete, the workflow knows to send the next task to the next assigned user automatically. Therefore, workflow-generated tasks can only be managed by the users, not created.
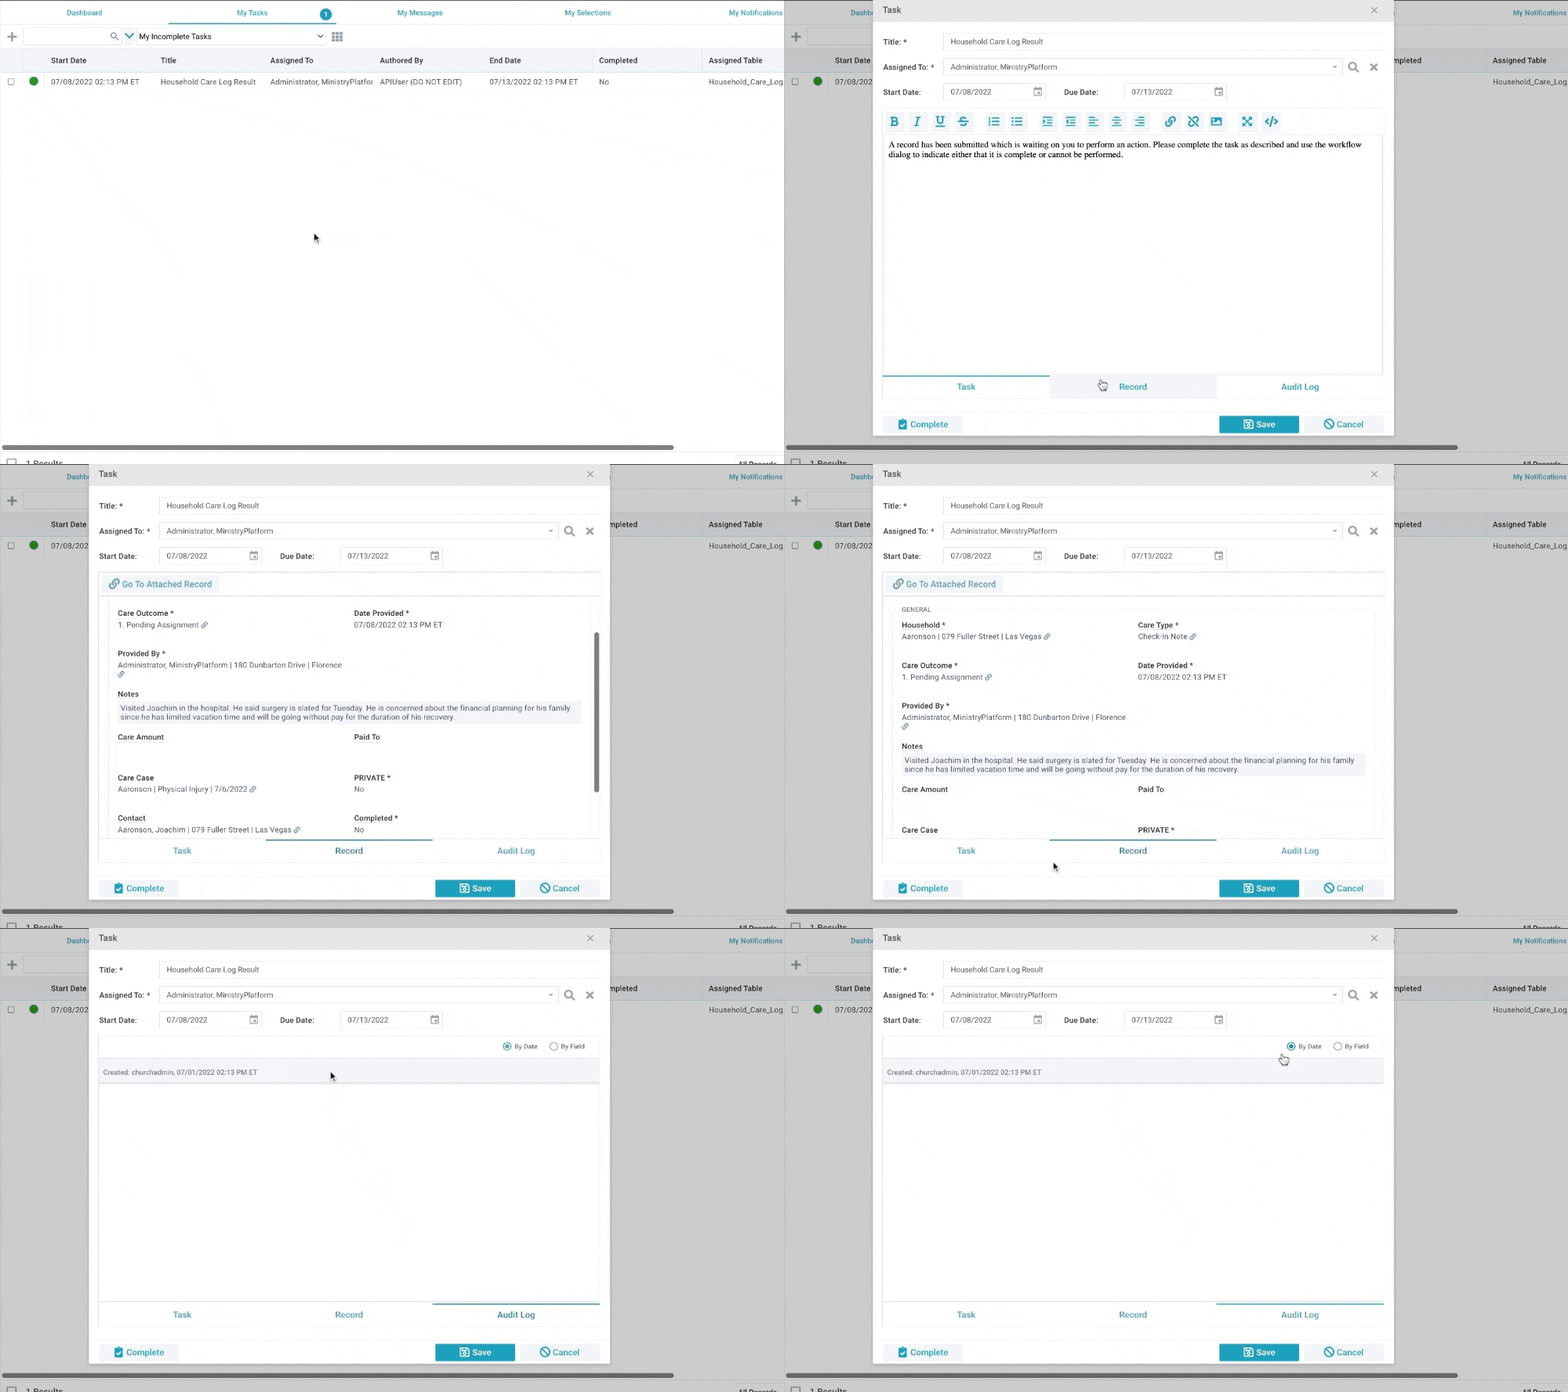
- A User can see their Tasks on the My Tasks tab of the Home Page
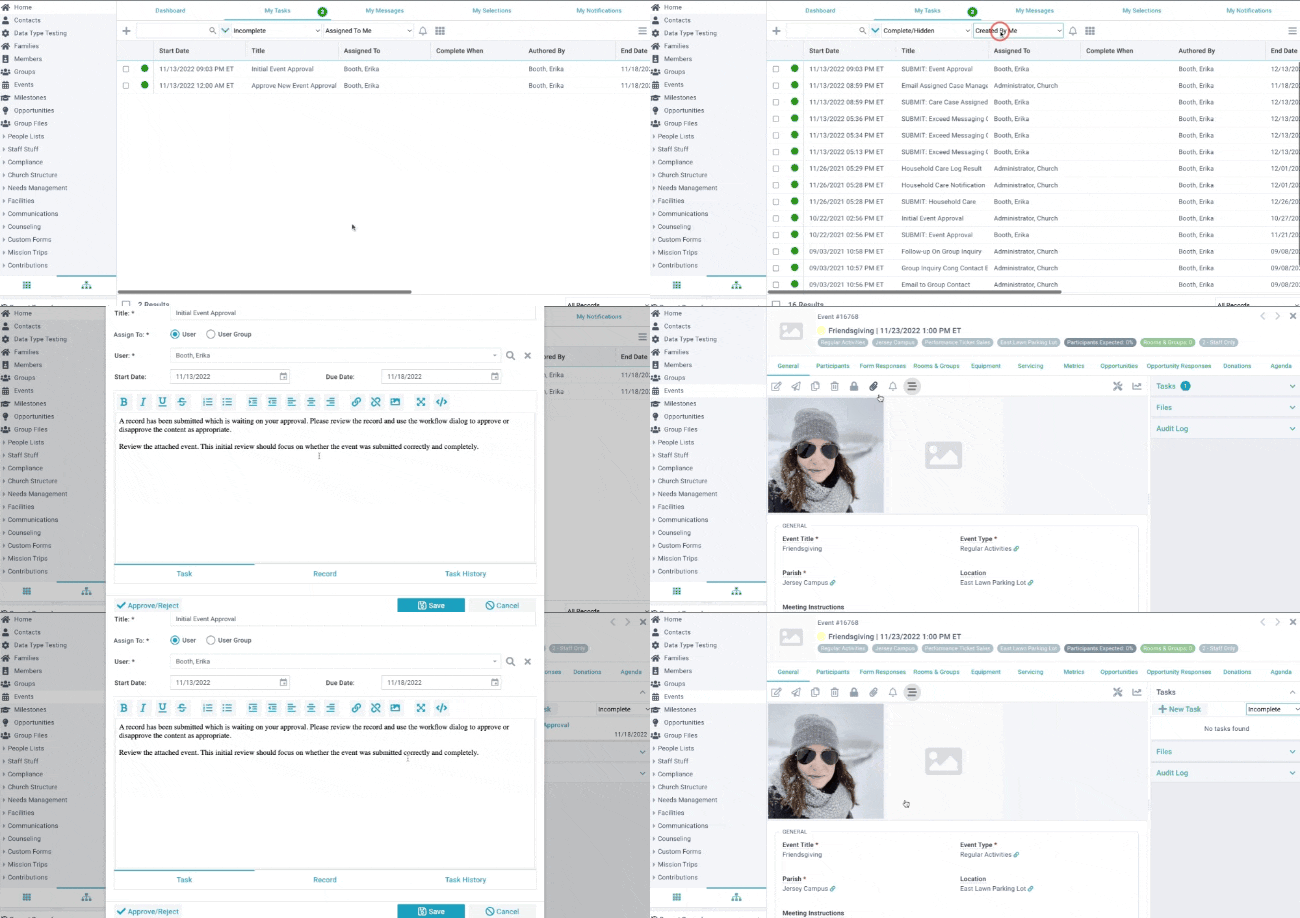
- Users can use the Task page Views to see which tasks have been completed and which tasks have been assigned or created by them. Views on the My Tasks page allow Users to filter by both Complete/Hidden or Incomplete tasks and tasks Created by Me or Assigned to Me. Pro tip: Set a notification for the Complete/Hidden and Created by Me view to get notified when others have completed the tasks you assigned to them.
Inside the New Task Tool

Task Details
- Assigned To — The User or User Group that needs to take action on the Task
- Task Title — Name of the Task
- Start Date — When the Task Starts (optional)
- Due Date — When the Task is due (optional - note that if the Task was created by a Process Step and no Deadline is specified, the Due Date will be calculated 5 days after the Start Date)
Task Dialog Tabs
Each Tab presents different ways of interacting with the Task.
Task Description
Enter information regarding the task with or without formatting
Task Dialog Buttons
- Save — Save this New Task.
- Cancel — Cancel any changes made in the dialog
- Complete — For existing Tasks, complete the Task to initiate the next step in the Process, or to close out the Task. Note, an Approval Task cannot be approved within the Preview pane (see Process Step > Get Approval for more information).
Assign a Task
To assign a Task automatically, a SPoC can set up a Process.
To assign a Task manually:
Create a New Task
Home page > My Tasks > New
Any other page > Action Menu > New Task
Inside a record > Action Menu > New Task (this method gives the option to attach the Task to the record you're in).
- Provide Task Information
- Title: The name of the task
- Assign To: Individual User or User Group. If you assign the task to a User Group, select
- Start Date: Date the task should begin
- Due Date: Date the task must be completed
- Save
View a Task
- Home > My Tasks > Open Desired Task
- If the User Task Notification is running: notification email > click desired link
To view the Task assigned to a specific record (regardless of the Task owner):
- Open the record, click the Tasks panel and then click the Task Name link:
- From an open Task record, you can see the Record ID that the Task is associated with. The Record ID refers to the primary ID of the page that the Tasks Process is connected to. For example: if the Tasks Process is connected to the Contacts Page, then the Record ID is the Contact ID.

However you choose to access it, the open Task record displays the details. If the user who assigned the Task used the Attach to Current Record option, the Task record has a Record Preview tab where the attached record can be previewed and you can optionally go to the attached record:
Complete a Task
To complete one Task
- Open the desired Task.
- Update any details, if needed (for future reference or for the benefit of the user who assigned the Task).
- Click Complete.
Or,
- Go to Home page > My Tasks tab.
- Select Task.
- Click Complete
To complete multiple Tasks
- Go to Home page > My Tasks tab.
- Select the desired Tasks.
- Click Complete.
- Update any details, if needed (for future reference or for the benefit of the user who assigned the Task).
- Click Proceed.
Reassign a Task
If a Task needs to be reassigned from one user to another, the user the Task is currently assigned to should:
- Go to Home page > My Tasks tab > open the desired Task.
- Edit the Assigned To field to reflect the desired user.
- Click Save
Note that rejected Tasks that are created and assigned because approval was rejected cannot be reassigned to another user (for example, REJECTED: Event Approval). Check out the Resolve Rejected Tasks page for more information.
Access All Tasks
All Tasks are stored in Communications > User Tasks. This page is helpful for things such as:
- Deleting or updating Tasks that were erroneously assigned to a user.
- Monitoring or completing Tasks for someone who is out of the office for an extended period of time (Note: an alternate option for SPoCs is to impersonate the User record and monitor/complete Tasks from the impersonated record).
- Monitoring Task activity in general.
Resolve Rejected Tasks
A Task can reject when it's part of a Process. Sometimes a rejected Task needs to be re-submitted, yet other times it simply needs to be completed. Check out the Resolve Rejected Tasks page for more information.


