Important: Selections are sticky! If you made a selection on a page and are going to make another selection on the same page, you should clear the initial selection unless you intentionally want to append the initial selection. Wondering if you already have a selection on a page? Check the bottom left corner of the screen. If it says "0 Selected". you don't have any records selected.
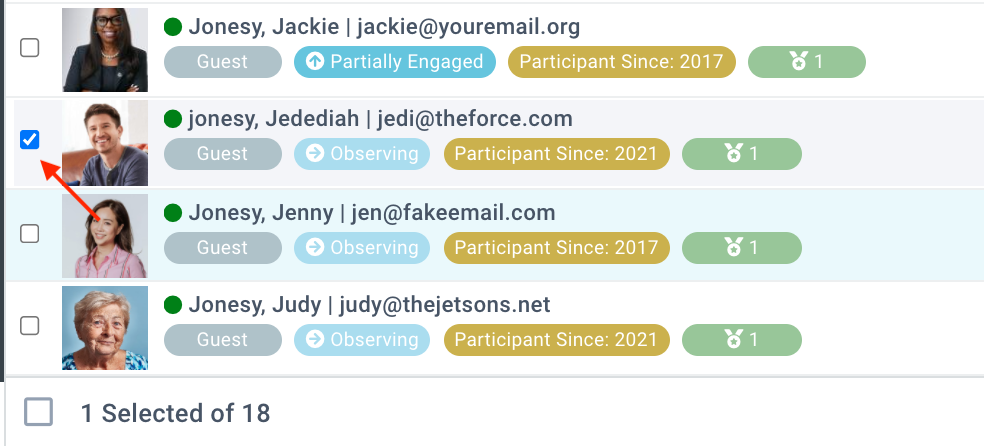
To select one or several records, click the box next to the record. A span of records may be selected by choosing the first record, holding the shift key, then selecting the last record. In this method, the first/last record and all records in-between will be selected.
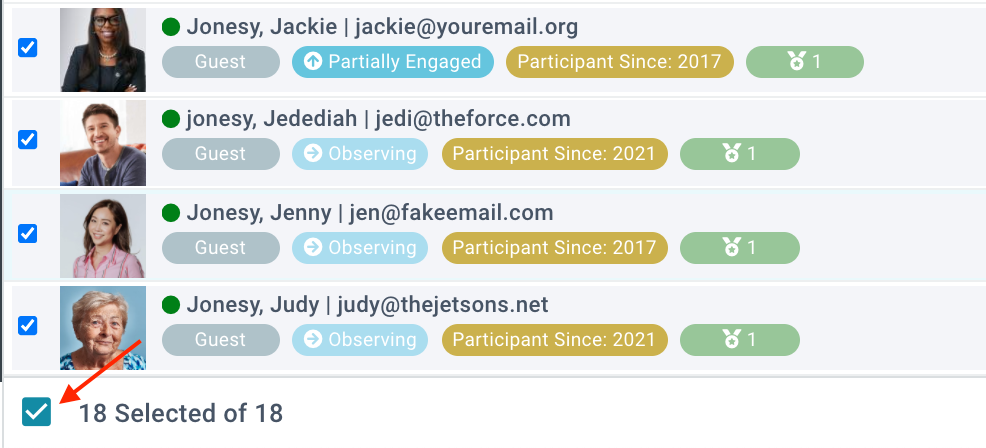
To select all records, click the box in the bottom left corner.
If you want to view only the records you've selected, choose Current/Unsaved Selection in the selection menu in the bottom right corner. The default will be to All Records.

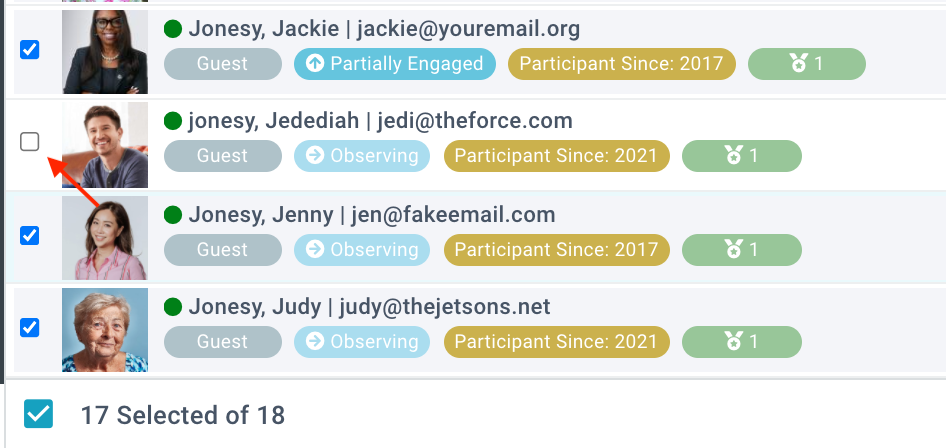
To remove records from a selection without clearing the entire selection, click the checkbox next to the record to unselect it.
To clear an entire selection, choose your selection in the selection menu (it will be Current/Unsaved Selection unless you previously saved/named your selection). Then click the "X" next to the selection menu. Once you've cleared a selection, the selection count in the bottom left corner of your screen will read 0 Selected. Note: Clicking the "X" will clear the entire selection currently showing in the menu.
Saving a selection allows you to return to the selection at a later time. To save a selection, choose Current/Unsaved Selection in the selection menu. Then click the save icon (next to the selection menu), select your desired Save Mode, and click OK.
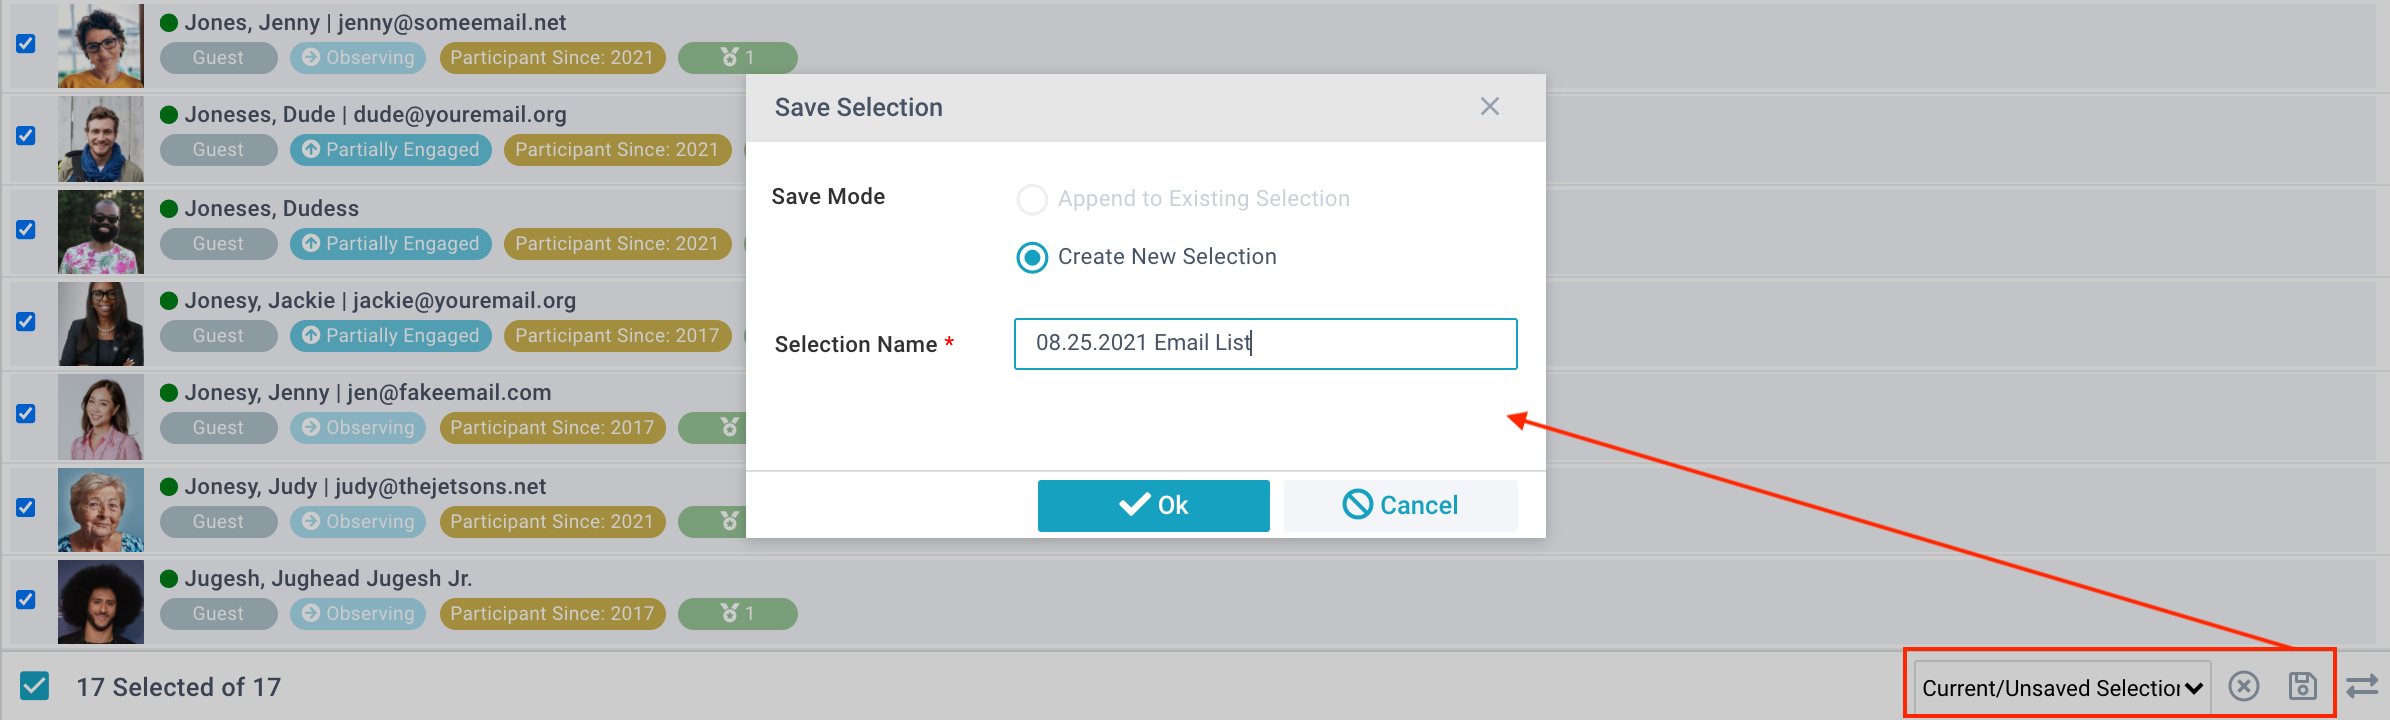
Upon saving your selection, the selected records clear from the grid view. But the selection is immediately accessible as an item in the selection drop-down list.
Remember: Selections are static! If you saved a selection of your Usher Team last week and someone joined the team this week, your selection does not include the new team member unless you append to the selection.
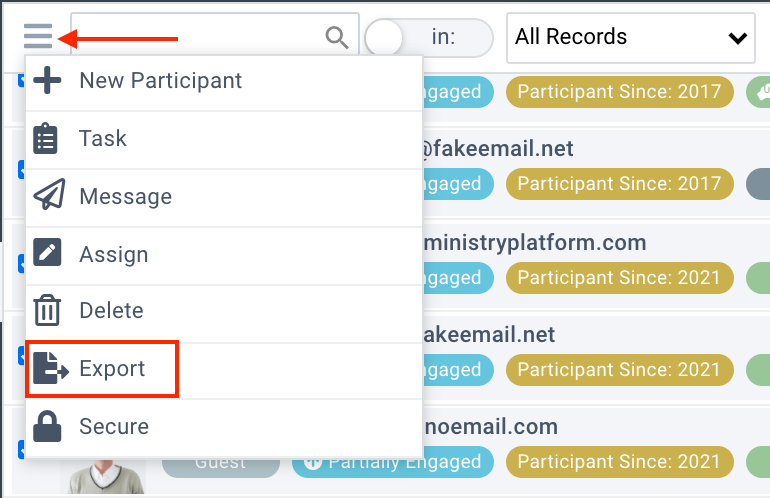
Exporting your selection allows you to use the information outside of MinistryPlatform. To export your selection, open the Action menu in the upper left side of the page and select Export:
Next indicate your desired Export Options:
Then choose your Output Format, and click Export. A file will download for your use.
The transfer button is available on all pages and sub-pages, and moves a selection from one page to another. There are many reasons transferring a selection might be useful, including taking advantage of page-specific reports or page-specific merge fields in the New Message Tool.
To transfer your selection, click the transfer arrows on bottom right side of the page. Then indicate the selection name and the desired page to transfer the selection to. Note that the available pages vary based on the page your selection is currently on.
You can also use the Transfer Selection Tool. Using the Tool will let you select heads instead, creating missing records, transfer your selection to another user, and more. The Transfer Selection Tool is in the Tools menu on the upper right side of the page.
Note: If you're gathering lists of people r associated with a Group, Event, Milestone, etc., you'll need to start on one of the "People List" pages or open up the Group, Event, Milestone record and select the participants in the sub-page.
Selections have a wide variety of uses. Using selections, you can:
At times, you may need to build a selection from several pages/areas of the system. The best way to do this is to utilize the "Transfer Selection Tool." This would allow you to create one selection of people who have attended multiple events, been participants in various or achieved certain milestones. The following would allow you to select participants from Groups and Events:
Any empty selections will be cleared every night by the Data Quality Routine.
