Your Knowledge Base is moving on 3/25/24! Our new Help Center provides all the articles you know and love (plus so much more) in a one-stop shop. Ask your SPoC for details!

Record Actions


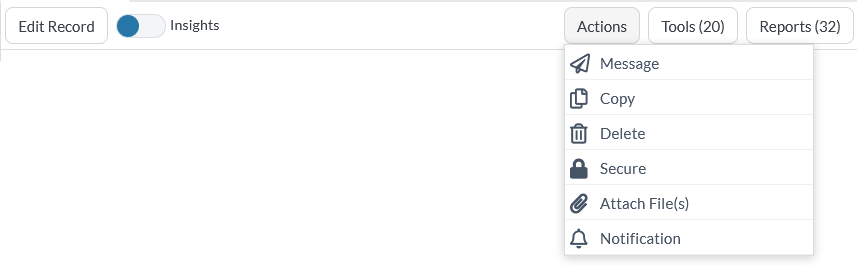
Once inside an open record, you have a variety of actions available to you on the record's toolbar. Toolbars vary by User based on the Security Roles that SPoCs have provided them, including varying from page to page.

Open record showing the bar with Edit Record option, options under the Action menu, and Tools and Reports menus

Edit Record

Clicking Edit allows you to modify the record's fields. See Editing Records to learn more.

Message

Clicking the paper airplane icon (cute, right?) opens the New Message Tool so you can send a message to the people related to the open record. For example, on Contacts, it will send a message to that Contact. But on Groups, the message can be sent to all Group Participants.

Copy

Clicking Copy allows you to duplicate the record. This simplifies data entry, as you can copy a similar record and then simply edit it as needed. Also, the Copy action on an Event record allows you to set up a recurring series.

The Copy action is not available on the Contact, Participant, and donor pages. Use the Add/Edit Family Tool to create new records on these pages. 

To copy a record:

  1. Open the desired record.
  2. Click Copy.
  3. If needed, check the desired boxes for sub-page information to be copied into the new record. The Copy tool will only copy up to 1,000 sub-page records. If there are more than that, select all the sub-page records and transfer them to the associated page to add back to the record once it is copied.
  4. Click OK.
  5. A new record is created (you know it's the copied record because the record's ID# is different than the original). Simply click Edit to make any needed changes, and then click Save. Note that any values populated in read-only fields are not copied into the new record. (E.g., if a copied Event is Approved=True, the copied Event is Approved=False until the Event is submitted and approved.)

To copy subpage record changes to all Events in the Series, use the Copy Subpage Data Tool.

Delete

Clicking Delete allows you to delete the open record. 

Delete with care! This is a powerful tool and should be used with extreme caution. Any data deleted from MinistryPlatform is completely gone. Recovering deleted data requires Professional Services and incurs a cost. As such, this functionality should be limited to users who are trained to use it wisely and correctly.
Note that records on the Contact or Participant pages should never be deleted. Instead, we recommend using the Combine Contacts Tool (if there are duplicate records) or inactivating them (if they no longer attend your church). 

To use the Delete action:

  1. Open the desired record.
  2. Click Delete.
  3. In the pop-up window, the affected records are listed (if any). These records depend on the existence of the records you're deleting. Choose the appropriate radio button based on what you want to do with the dependent records. Note that in order to delete a record on a page that is Direct Delete Only, you must be on the record's page to delete it. 
    • Reassign: Allows you to choose a different record to associate the dependent records with.
    • Unassign: Allows you to keep the dependent records, but not have them associated with that you're deleting.
    • Delete: Deletes the dependent records.
      • Please note: When a record is deleted only dependent records are available in the delete dialog. Secondary records that are more than one table removed from the original would need to be deleted separately.
      • For example: Deleting an Event Participant record can delete related records like Form Response Answers but will not delete the secondary records such as Form Response which would need to be deleted separately. 
  4. Click Delete.
  5. A pop-up window asks you to confirm the deletion. To proceed, click OK.
  6. The record is now deleted, any outstanding Tasks associated with the record is deleted and you are returned to the data grid.

The Delete action is also available on the page's data grids and record sub-pages.

When deleting an event that is part of a series, a dialog box will appear after clicking the Delete button where you will specify if you want to delete a single event, that event and all future events, or the entire series. For more information on deleting Events in a series, see Recurring Events (Series).

If you delete a selection of records, the delete action is per record. Canceling deletion of a selection of records will stop the delete action at that record. No additional records will be deleted, but all previous records are permanently deleted.

Secure

Clicking Secure allows you to restrict access to the open record. Check out record restrictions to learn more.

Attach File(s)

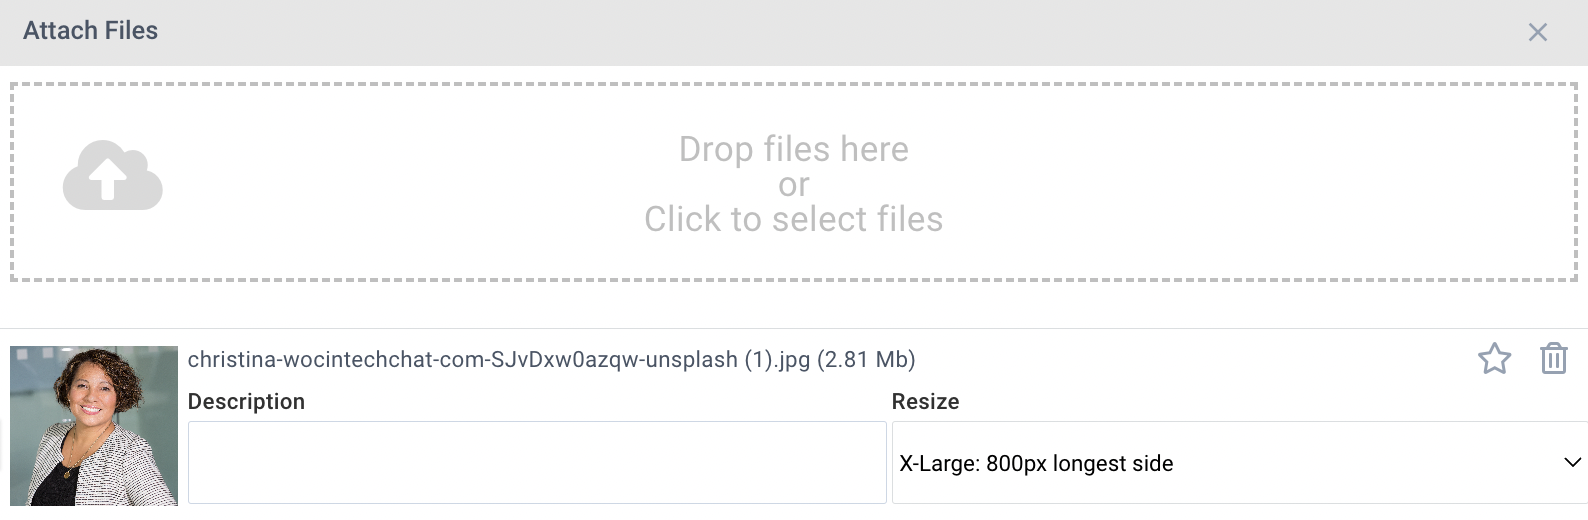
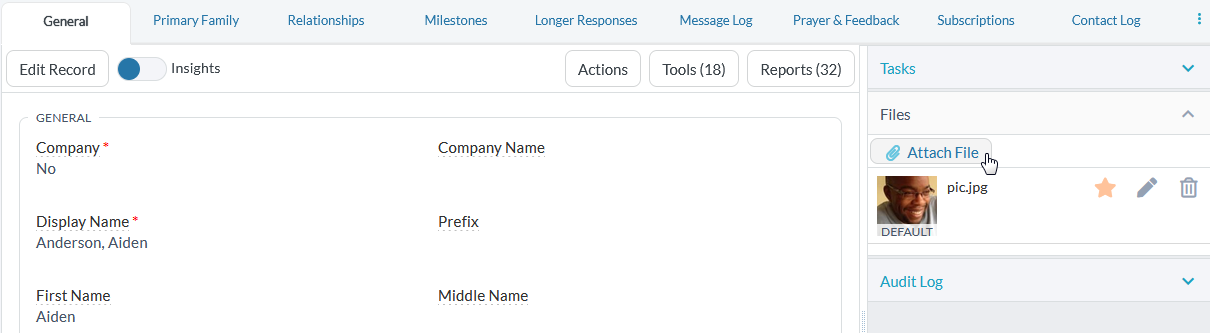
Clicking Attach File allows you to attach photos or other files to the open record. To do so, simply open the desired record, click Attach File, choose the desired file and click Attach File. If you attached a photo, it displays in the upper right corner of the record. If you attached a file like a PDF or an additional photo, the list of attached files appears in the Files panel.

Attaching Files
  1. Click the paperclip icon.
  2. Click "Drop files here or Click to select files".
  3. Browse to the desired file and click Open.

OR

  1. Open File Explorer and drag the desired file into the  "Drop files here or Click to select files" area.
  2. Give the attachment an optional description.
  3. Choose resize options, if needed. Note: The Attach File dialogue will remember your resize preference and automatically apply it to the next file you attach until you clear your cache.
  4. Tap the star icon if you'd like it to become the default image for that record.
  5. Repeat, if desired.
  6. Choose Attach.

OR


Attaching Photos

When attaching photos, we recommend using PNG, JPG, BMP, GIF or animated GIF. TIFF files are not recommended. MinistryPlatform allows files up to 20MB in size to be attached to records.  

Note: Images will be cropped to create a square thumbnail. The square is determined by the shorter side and the cropping is centered (an even amount is taken from both left/right or top/bottom). This means you may get a perfectly cropped picture or one that only shows the top of a head or shoes. Square photos or those with faces near the center of the image look best. Avoid very oblong pictures with faces near the edge.

Note: The "default" image on the Contacts page will be used as that Contact's image on the contact card as well as the various apps. Want to change the default? Simply tap the cute little star next to the image you'd like to feature and presto-chango!

Attachment Access

Files will only be available from the open record of the record they were originally attached to. If you attach a file to the Contact record, only users who are on a Contact record will be able to view the file. Note that anyone who has read rights to a page will be able to see any attachments added to records on that page. It isn't recommended to place high security required files on main pages such as Contacts or Participants. Consider attaching more private files to other records (such as Milestones, Form Responses, Mission Trips, etc.) that could be hidden using Record Restrictions if the attachment needs more security than what the Security Roles provide.

To capture a photo attachment for use elsewhere, open the desired record, click the Files panel, click the link, and download the image from the pop-up window.

Editing Attachments
The File Viewer allows users to preview images in the pop-up dialog and, if desired, rotate the image.

Clicking on an attached file from the Files panel will open the File Viewer.  The viewer allows users to preview images in a pop-up dialog and, if desired, make different changes to the file.  The File Viewer allows users to:

  • Rotate an image
  • Save as a PDF
  • Print
  • Download
  • Zoom in and out 

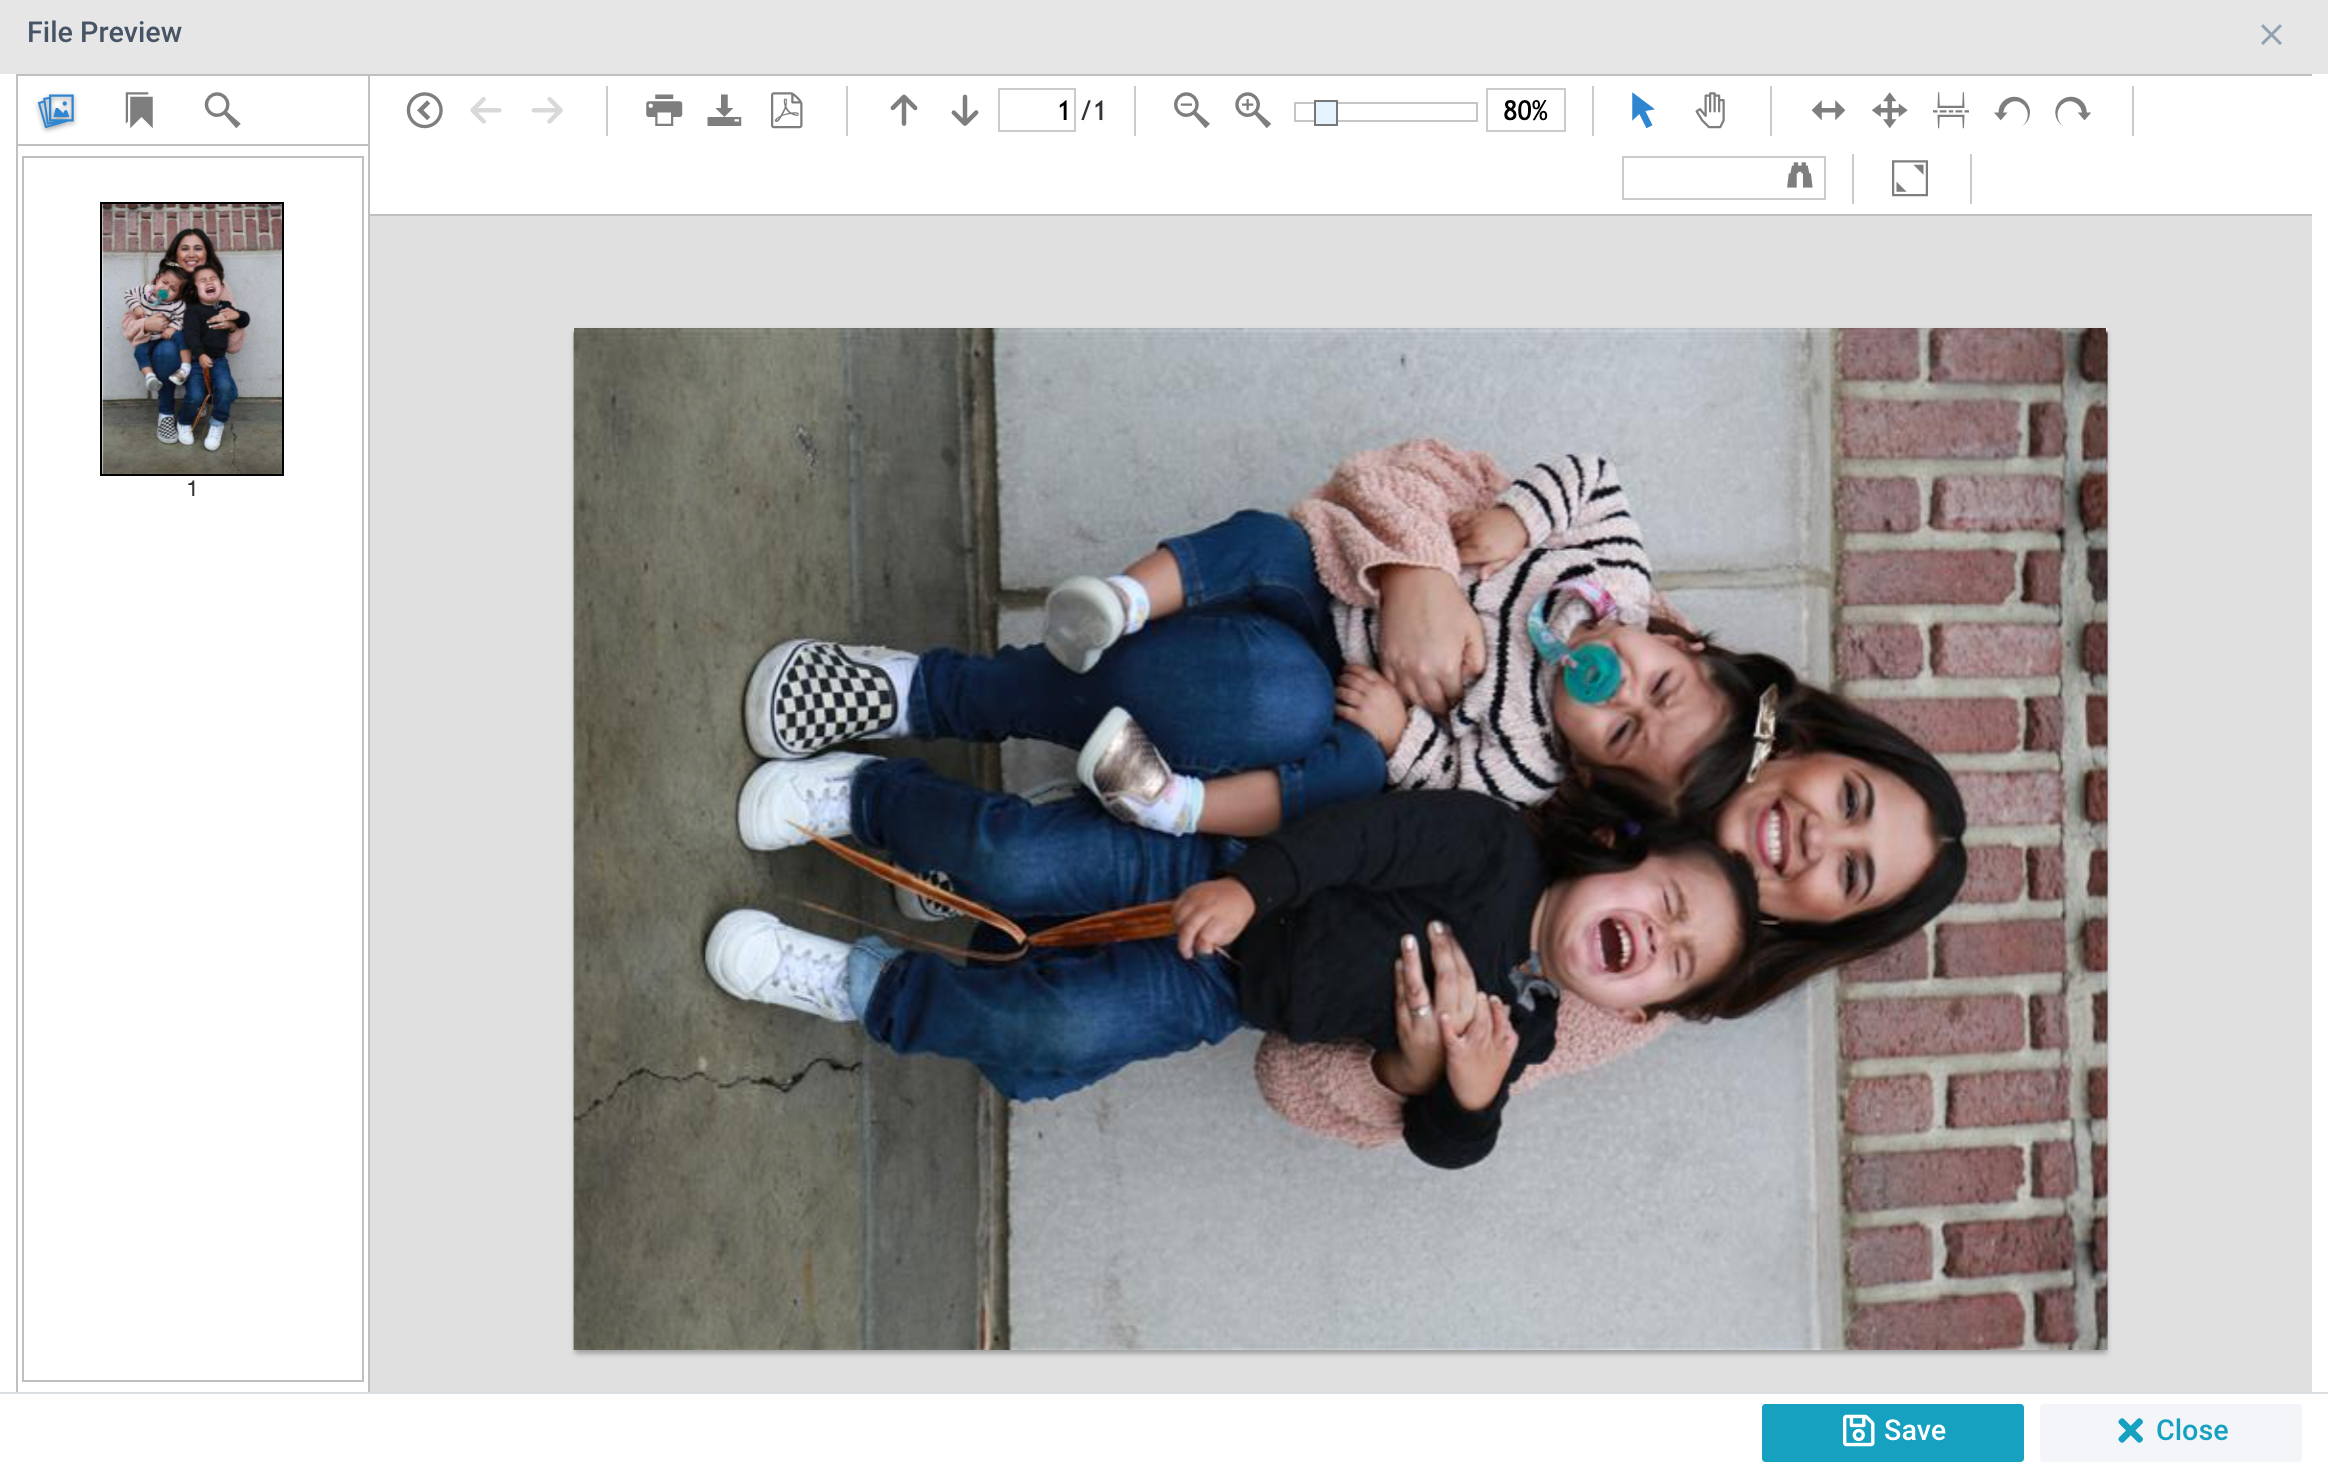
Once a user has made desired edits, an option to Save will appear.  Clicking this button saves the changes and returns the user to the open record. 

Encrypted PDF files are supported. Fillable PDF files are supported, but values will not be visible unless downloaded.

Removing an Attachment

To remove an attachment, open the desired record, click the Files panel, click the Trash Can/X of the file to delete, click the Trash Can/X again to confirm the deletion. 

Notification

Clicking Notify allows you to create an Item Notification for the respective open record.  An Item Notification is a scheduled email associated with a View, Selection, or in this case, a single Record. 

Record Notifications can be created for any single Record that the user has access to in order to:

  • Receive notification emails on a schedule or triggered by changes made to a record. 
  • Emails will display the selected record arranged according to the page's "All Records" view. 

Tools

Clicking Tools gives you access to the Tools available on that page, some of which open directly with the open record's information auto-filled (for example, the Add/Edit Family Tool).

Reports

Clicking Reports gives you access to the Reports available on that page, some of which open directly as a report about the open record.