Got passwords? Us too! And if tracking, remembering, and correctly typing all those passwords feels like a lot right now, we have the solution—authentication via code. Authenticating via code is a secure, alternative method to login "on demand" without the need to remember or reset those pesky passwords. #easybutton
Basics
- Authenticating via code is an all-or-nothing proposition. It's either on for everyone or off for everyone.
- Users cannot authenticate via code if they're using a shared email address or cell phone number.
- If you've enabled multi-factor authentication (MFA), the User will receive a second code when it's multi-factor time.
- If a code is expired or entered incorrectly, the User is given the option to "Try Again" and can request a new code.
User Walkthrough
If you've enabled authentication via a code, your Users will be presented with a familiar multi-factor authentication flow:
- On the log-in screen, Users will have the option of "Send Code" rather than entering their username and password.
- They'll then be asked whether they'd like to receive their code via text or email. Note: The text option will be hidden if SMS isn’t configured for your Domain.
- Within fifteen seconds of clicking "Send Verification Code," the User will be sent a six-digit code via their selected method. Note: Messages are sent via the Platform and logged in the Message Log.
- On the login screen, they'll see a text box to enter their code. This page also displays a 10-minute countdown clock for the User to enter their code.
- When selecting "Enter," the User can also select "Keep Me Logged In". This keeps them logged in until the next time they log out or up to three months. Note that, when this option is selected, it takes precedence over MFA "Remember Days".
Configuration
 Like all things log-in, authentication via code needs to be configured on your Domain record, where you'll need to add a ReCAPTCHA Site Key and reCAPTCHA Key Secret. Ready to get started?
Generate reCAPTCHA Site Key & reCAPTCHA Key Secret
- Navigate to https://www.google.com/recaptcha/admin/.
- Log in using any Google credentials. Note: The authenticated Google account is automatically listed as an owner, so choose wisely.
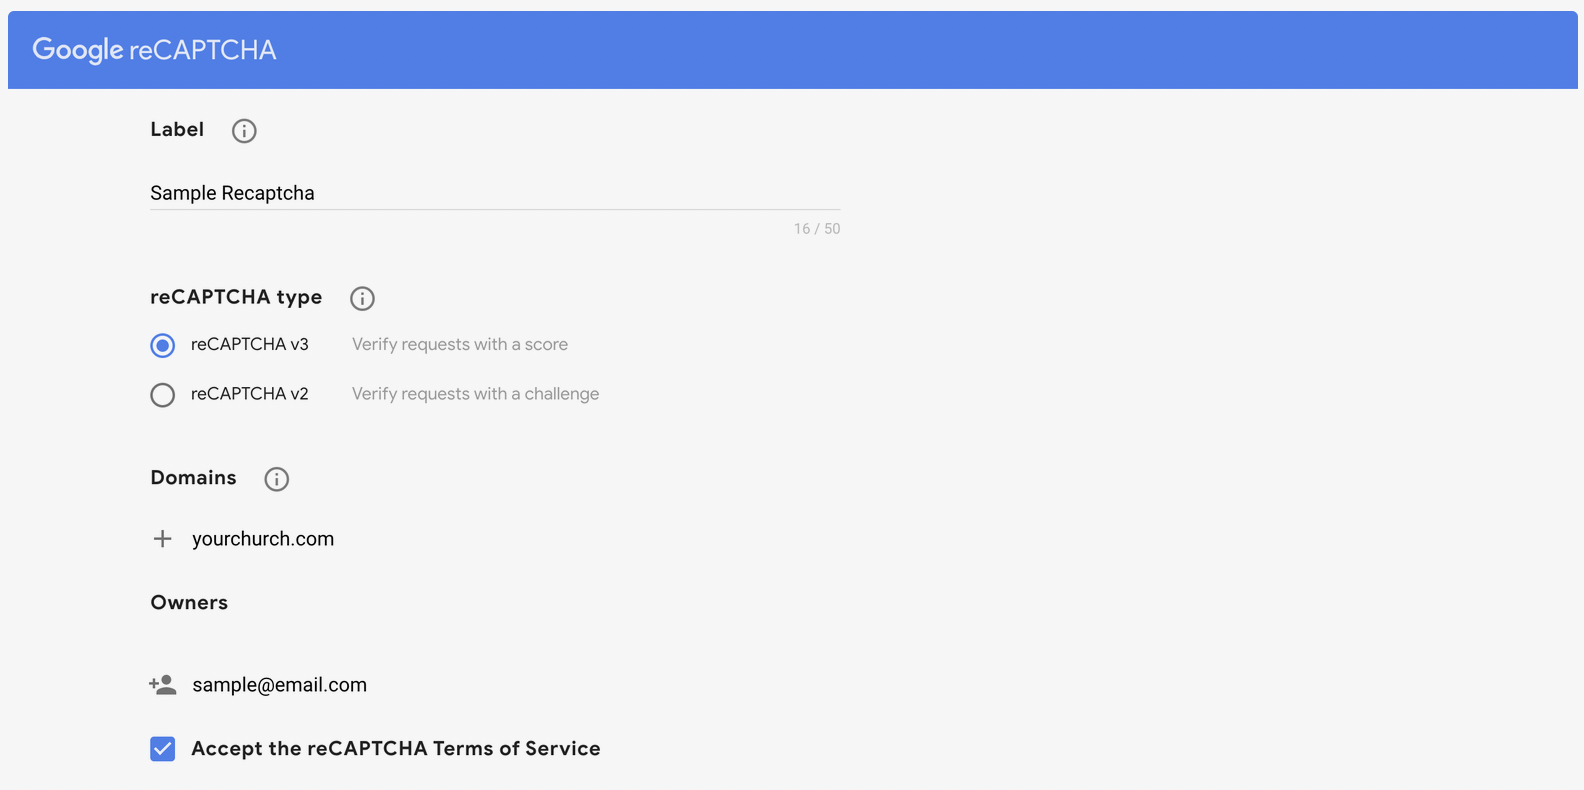
- Provide the required information:
- Label: The label for your site.
- Recaptcha Type: reCAPTCHA v3
- Domains: At least one Domain. This must match the base church domain.
- Owners: The authenticated Google account is automatically listed as an owner. Add other owners as desired.
- Accept reCAPTCHA Terms of Service.
- Save.
After saving, the reCAPTCHA Site Key and reCAPTCHA Key Secret will be generated so you can copy and paste them into your Domain record.
Configure Authenticate via Code in the Platform
- System Setup > Domains Account.
- Edit.
- Set Auth Code Enabled to Yes.
- Copy and paste the reCAPTCHA Site Key into the reCAPTCHA Site Key field.
- Copy and paste the reCAPTCHA Key Secret into the reCAPTCHA Key Secret field.
- If you want to send the code via text, confirm that the SMS fields are configured.
- Save.
