Adding the SendGrid integration to the Platform improves performance and provides (almost) instantaneous information feedback about the status of the messages you send. So the next time a ministry leader wonders how their newsletter
was received, you'll be able to tell them with impressive speed and accuracy.
Ready to get started? It's as easy as 1-2-3!
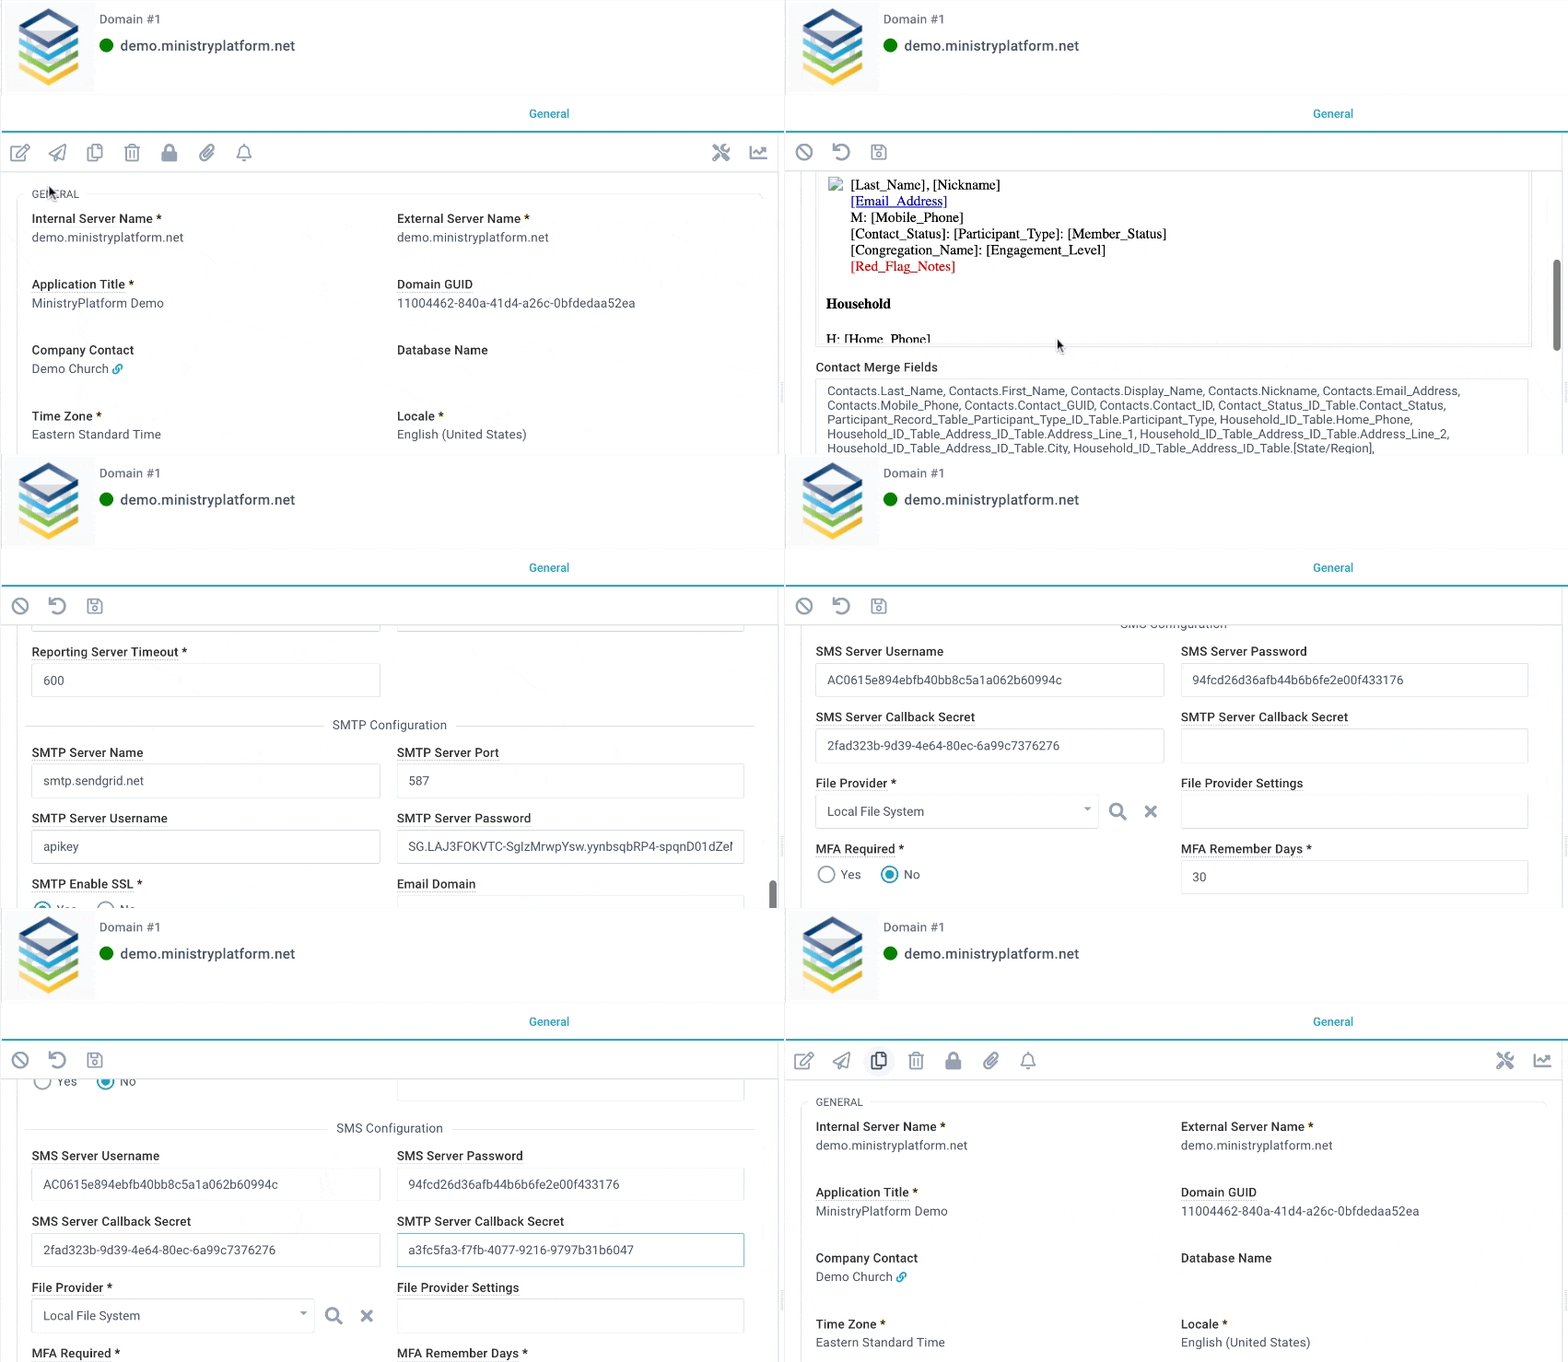
- Configure the Platform: Just add a GUID to one field and the Platform is ready to go!
- Generate an Event Webhook: Use the formula below to generate a webhook.
- Configure SendGrid: Follow the instructions below to add your Webhook to SendGrid and you'll have your integration up and running in no time!
Configure the Platform

- Generate a GUID. Pro Tip: Use a GUID Generator to quickly generate a random value.
- System Setup > Domains/Accounts.
- Edit.
- Add GUID to SMTP Server Callback Secret.
- Save.
Generate an Event Webhook
Now that you have your GUID and have added it to the SMTP Server Callback Secret field, you'll need to generate an event webhook to use when you configure your SendGrid account. Here are the components:
- Your church's base URI. Pro tip: It's the part of your Platform URL before the "/mp".
- Add "/ministryplatformapi/callback/sendgrid/" to the end of your base URI.
- Add your SMTP Server Callback Secret after the final "/" Pro tip: The SMTP Server Callback Secret is the GUID you generated above.
Want an easy button?
- Copy the code below and paste it into a document.
- Replace "{your domain}" with your Domain name, which is the part of your MinistryPlatform URL before "/mp".
- Replace SMTP Server Callback Secret with the GUID you added to the SMTP Server Callback Secret in the Platform.
https://{your domain}/ministryplatformapi/callback/sendgrid/[SMTP Server Callback Secret]

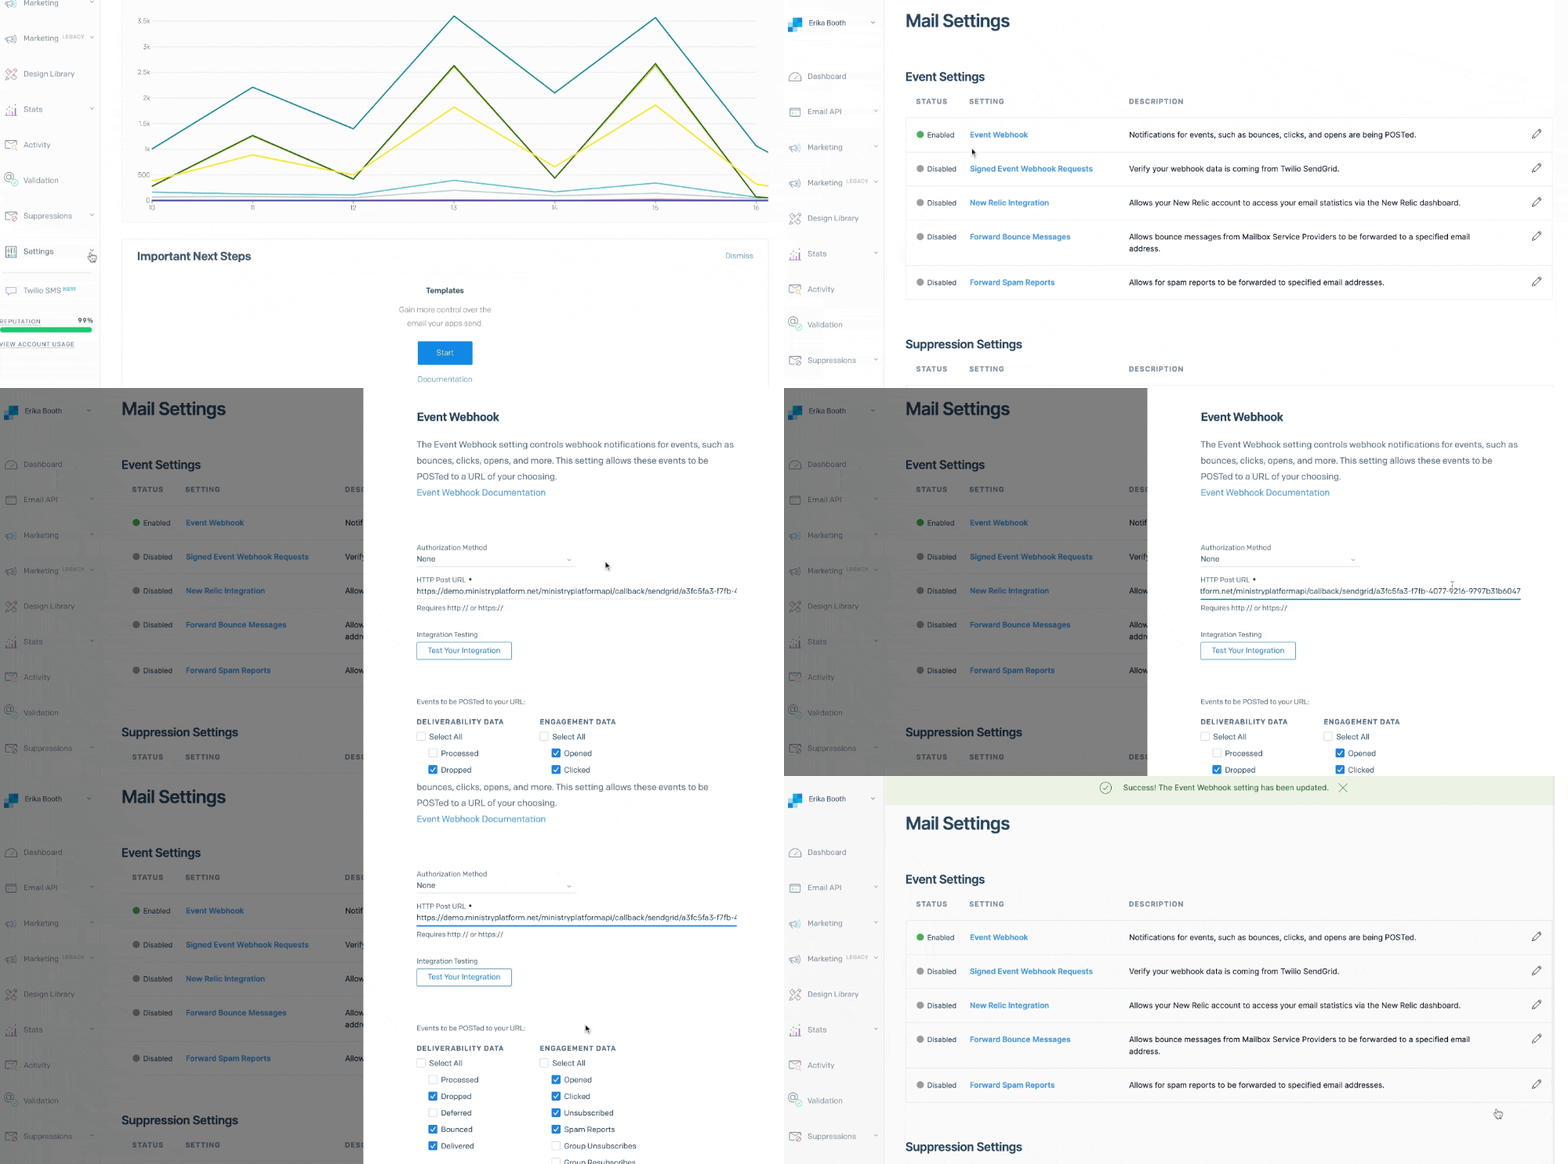
Configure SendGrid

Important! If you already have an Event Webhook configured in SendGrid, you'll need to replace it with this newly configured webhook.
- Log in to SendGrid.
- Go to Settings > Mail Settings.
- Event Webhook > Edit.
- HTTP Post URL > add your newly created event webhook. Note: Be sure to add your Church's webhook; the one shown above is just an example.
- Select the Deliverability Data and Event Data:
- Deliverability Data: Dropped, Bounced, Delivered.
- Engagement Data: Open, Clicked, Unsubscribed, Spam Reports.
- Toggle on Event Webhook Status to Enabled.
- Click Save.


