Your Knowledge Base is moving on 3/25/24! Our new Help Center provides all the articles you know and love (plus so much more) in a one-stop shop. Ask your SPoC for details!
If you do not have any additional options for this Product, you're done. If you need to create options, see Creating Option Groups & Prices.
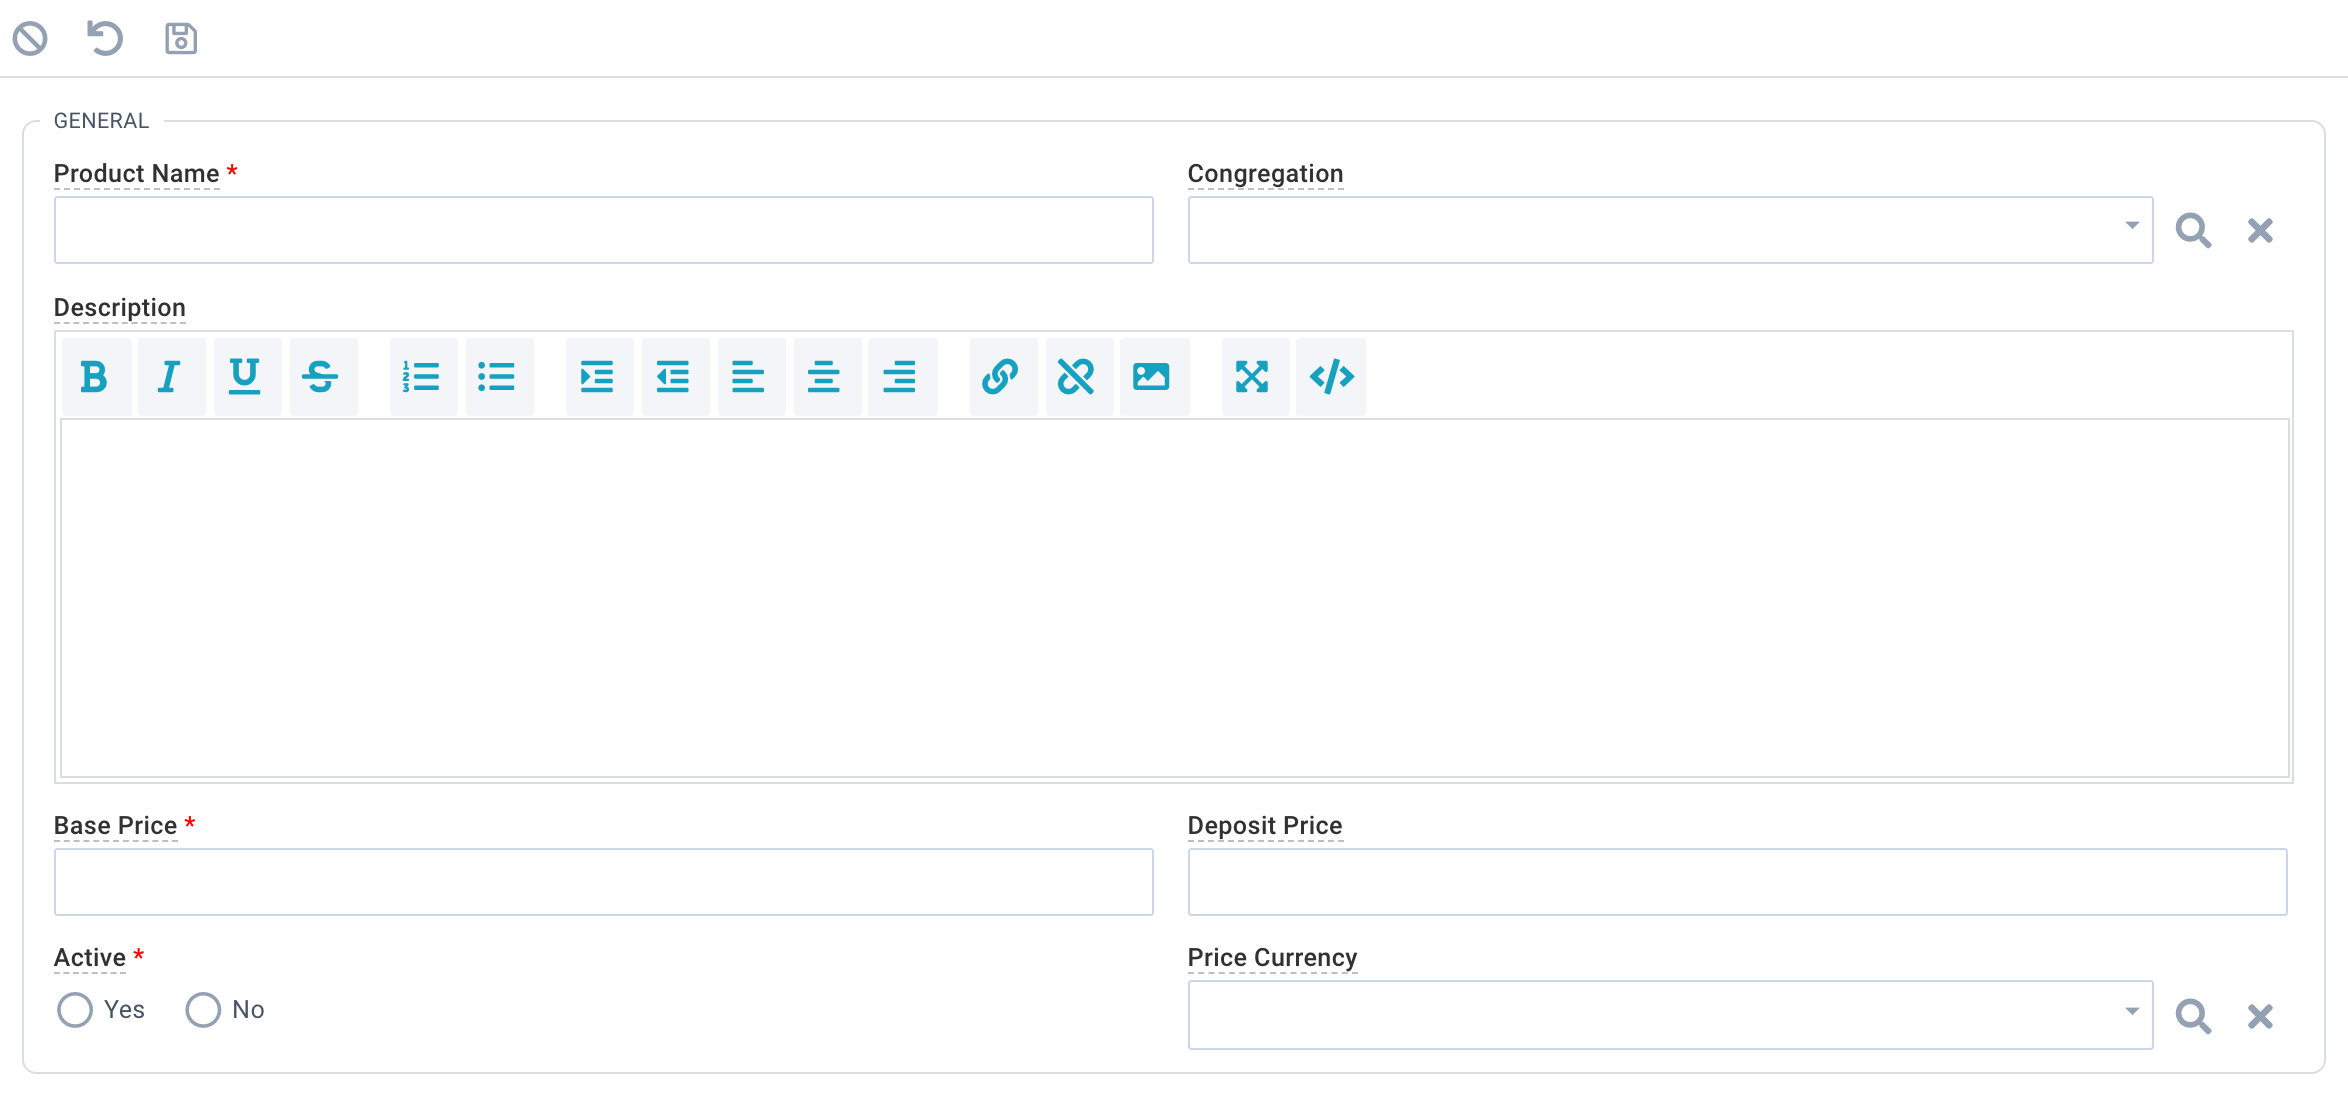
Product Name: A required title for your Product. Note: This name displays on the Event Details & Registration Widget, so make it clear and avoid jargon.
Congregation: Optional value to ensure Users are limited to Locations allowed with Global Filter permissions.
Description: Indicating a description helps make sure users don't create the same product concept twice.
Base Price: Indicate the price that all registrants pay. If needed, it can be $0.
Deposit Price If desired, indicate a deposit price; that is, a portion of the base price that must be paid at registration. Registrants will see a price drop-down list and can choose to pay the Base Price (by default) or the
Deposit Price. If the registrant pays the deposit, the balance can be paid later via My Invoices.
Note: Either the deposit price or the base price must be paid at registration. The deposit only goes toward the base price. Any Product Option Prices will still be required for payment at registration.
Active: if Yes, the Product is available for Event registration.
Price Currency: If your church accepts multiple currencies, be sure to specify the currency for this Product's prices so that users are not charged the incorrect amount. (Currency values are stored in System Lookups.)
When autocomplete results are available use up and down arrows to review and enter to select.