Power Automate is a flexible, dynamic tool that takes the power of the Platform to the next level. And you don't have to go it alone—Professional Services can help create your Power Automate Connector and initial Flow. The time Professional
Services spends on Flow creation is subject to the hourly $110 rate, but once configured, you'll be able to modify the Flow.
Want to see Power Automate in action? Check out the Using Power Automate to Automate Ministry webinar and the My First PowerAutomate Flow With MP In 1 Hour video from the MinistrySmart Conference!
Basics
Power Automate is Microsoft’s low-to-no-code integration platform that enables workflows, automatons, and more across a set of known connectors. That means you can leverage the power of the Platform to create automated workflows between the Platform
and your favorite apps and services to synchronize files, get notifications, collect data, and more. Making ministry happen has never been easier!
Configure the MinistryPlatform Connector
Before you get started, set yourself up for success by putting a few things into place:
- Obtain your Power Automate License. Licenses are $15 for each person who will be creating a flow using the same connector, but Microsoft might
offer discounted pricing for non-profits.
- Download the MinistryPlatform.swagger.json file. Feel free to review the related files in Github.
- Open MinistryPlatform and navigate to the Administration section.
- Open a GUID generator in a separate tab and generate a GUID.
- Open Power Automate in a separate tab.
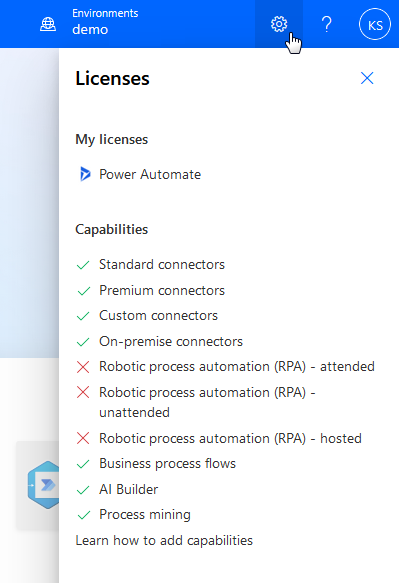
- Confirm your license gives you the access you need:
- Click the gear icon at the top right to open the Settings menu, then select View My Licenses.
- Most of the items under "Capabilities" should have a green checkmark next to them.
- Make sure that you have access to both "Premium connectors" and "Custom connectors".
In Power Automate
- From the left menu, select Custom Connectors. (You may need to click More to see this option.)
- At the top right, click New custom connector, and select Import an OpenAPI file.
- Enter a Connector name, then click Import and select the MinistryPlatform.swagger.json file you downloaded.
- Click Continue.
- On the General tab, set the Host URL to your MP base URL.
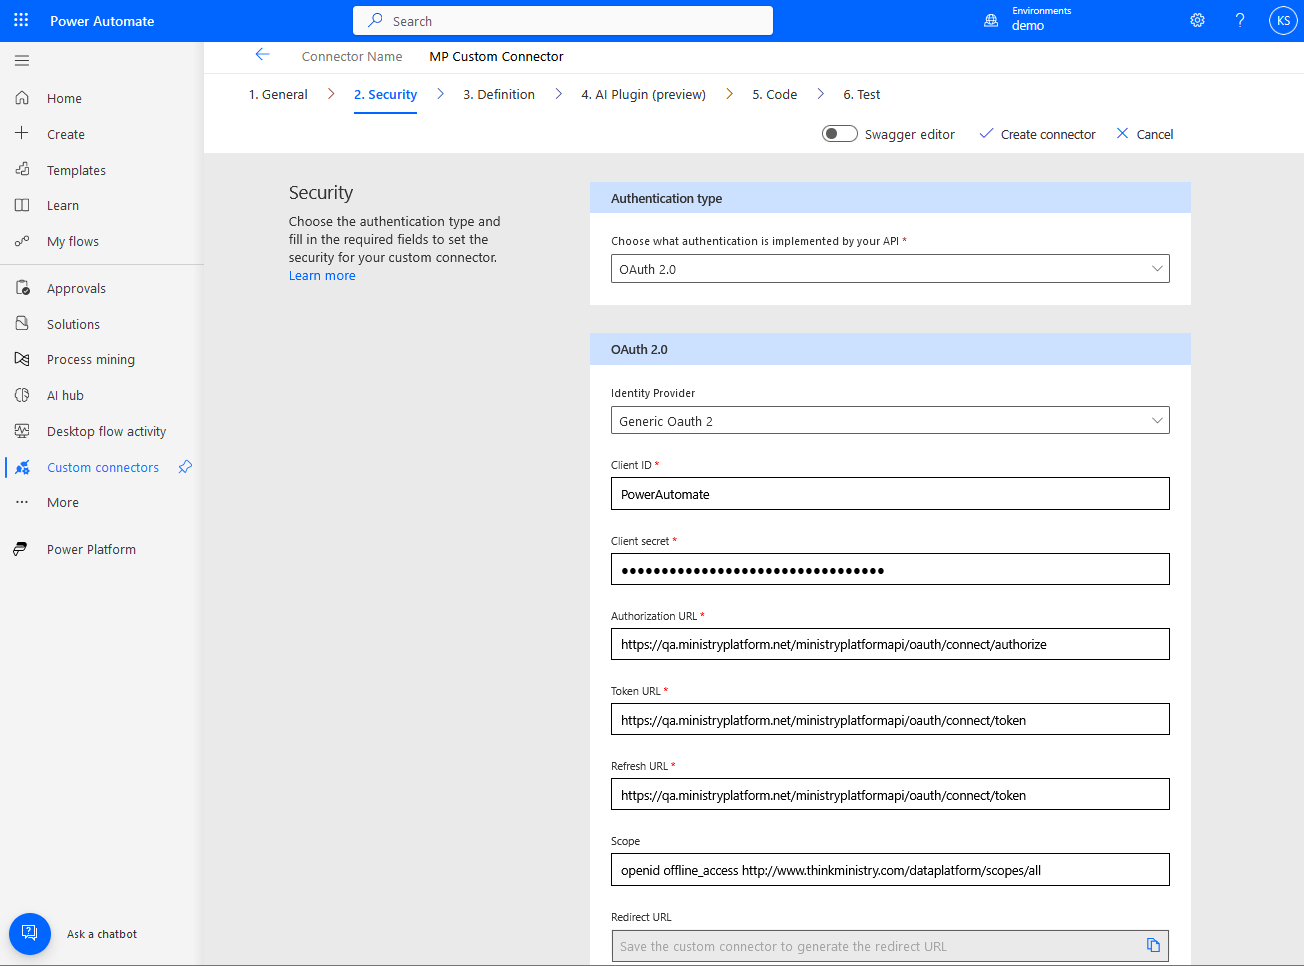
- On the Security tab, add "PowerAutomate" to the Client ID field.
- For Client secret, paste in the GUID you created using the GUID generator.
- In the Authorization URL and Token URL fields, replace "qa.ministryplatform.net" with your MP base URL.
- Copy the Token URL into the Refresh URL field.
- Click Create connector at the top. This populates the Redirect URL field.
- Copy the newly created Redirect URL. (You'll add this to the API Client record in the Platform.)
In MinistryPlatform
- Go to Contacts, and create a new Contact record with the following information:
- Display Name: PowerAutomate
- Go to Administration > Users, open the APIUser record, and copy it (and its security roles) to a new User record. Then, enter the following information:
- User Name: PowerAutomate
- Display Name: PowerAutomate
- Password: P0werAutomate!
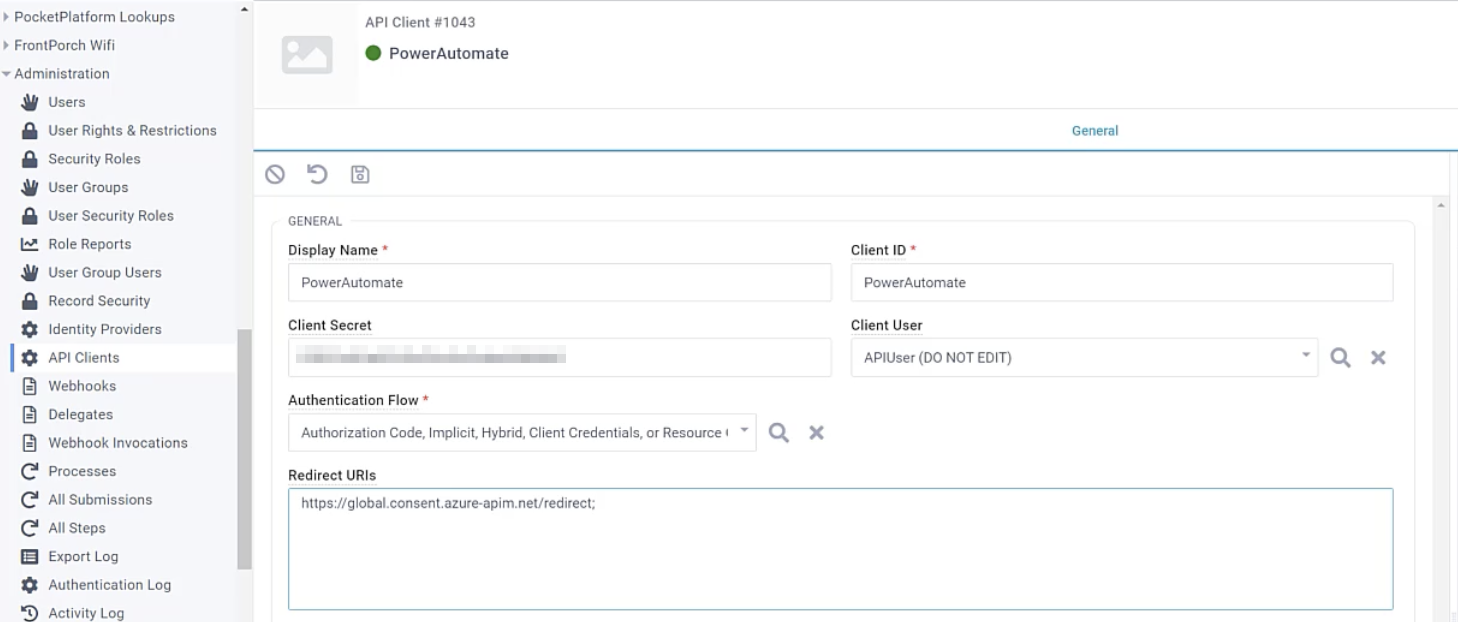
- Go to Administration > API Clients, and create a new API Client with the following information:
- Display Name: PowerAutomate
- Client ID: PowerAutomate
- Client Secret: Paste in the GUID you created using the GUID generator.
- Client User: API.
- Authentication Flow: Authorization Code, Implicit, Hybrid, Client Credentials or resource Owner.
- Redirect URIs: paste in the URI you copied in Step 10 above. Pro Tip: Add a semi-colon to the end of the URI.
- Leave all other fields as-is.
Return to Power Automate
- On the Security tab, paste the same GUID you used as the Client Secret in the Platform into the Client Secret field.
- Continue through the Definition, AI Plugin (preview), and Code tabs, leaving the information as-is.
- On the Test tab, click Update connector at the top. This may take a few minutes.
- Click + New connection. You'll see a browser pop-up with the SSO window.
- Click Test Operation. If successful, you'll see a green check next to the connection you tested.