Configuring the Azure Active Directory external login will allow your Users to log into their account, but they will not be able to create a new account via this external login.
In order to provide External Authentication, you must create and properly configure an Identity Provider. Before you get started ...
- Confirm you have System Administrator rights to the Platform and Administrative rights to Azure Portal > Active Directory
- Log in to the Platform and Azure. Pro tip: Stay logged in to both the Platform and Azure while you're setting up authentication.
Register Your Azure Active Directory
- Admin > Active Directory > App Registrations
- New Registration
- Name your Application
- Select Your account type. Note: You'll need to choose one of the two supported account types:
- Option 1: Accounts in this organizational directory only (Default Directory only - single-tenant)
- Option 2: Accounts in any organizational directory (Any Azure AD directory - multitenant) and personal Microsoft Accounts (for example, Skype or Xbox)
- Add your Redirect URI
- Select "Web" from the dropdown menu
- Add your Platform URL (for example, https://ministryplatform.com/mp)
- Register > Overview (you'll be redirected to a successful landing page)
- Copy the Application [Client] ID (you'll need this when it's time to configure the Platform)
Create an Identity Provider Record in the Platform
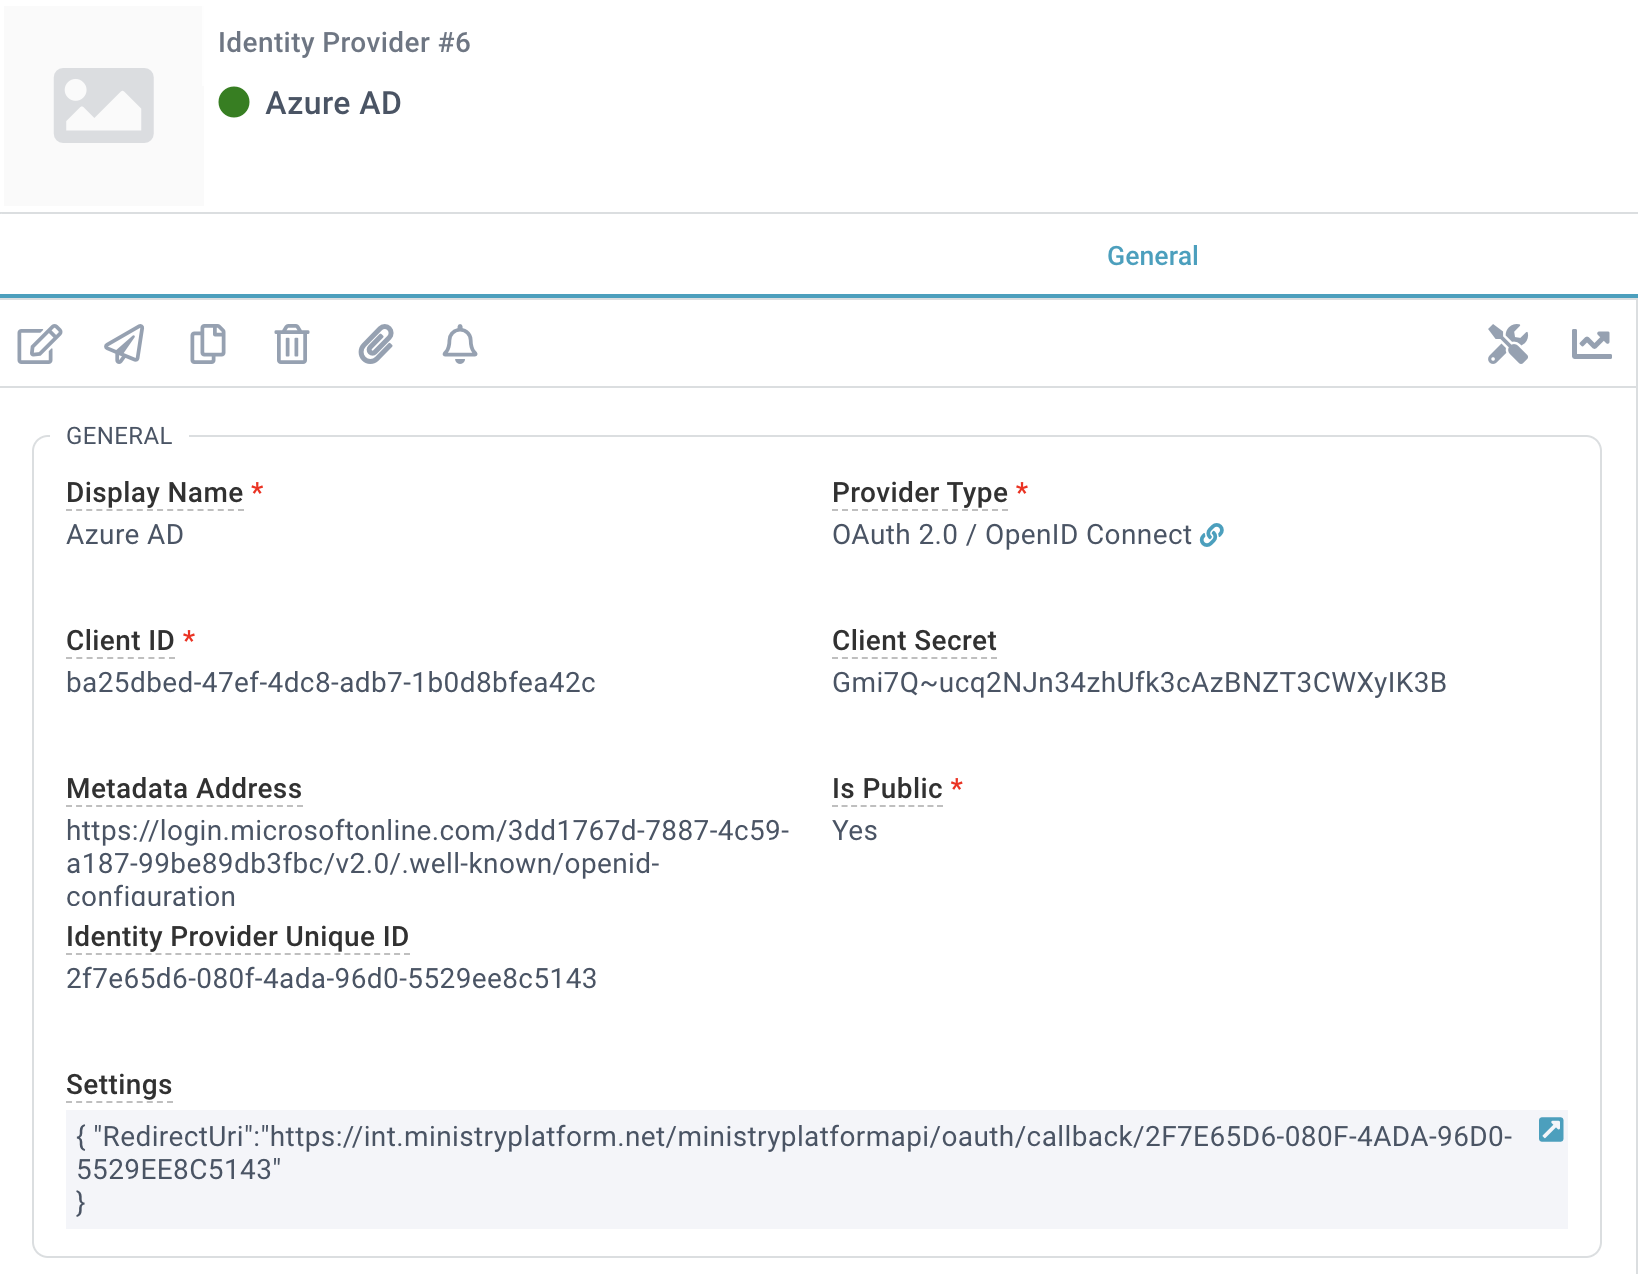
- Administration > Identity Providers.
- Create a New record:
- Display Name: Azure AD
- Provider Type: OAuth 2.0/ OpenID Connect
- Client ID: The Application [Client] ID you copied from Azure
- Client Secret: leave blank for now
- Metadata Address:
- Go back to your newly created Azure registry
- Overview > Endpoints > OpenID Connect Metadata Document
- Copy the URL
- Paste the URL into the Metadata Address field
- Is Public: Yes
- Save. (This will generate the Identity Provider Unique ID GUID.)
- Edit.
- Settings: Add the Redirect URI Endpoint as shown below, using the Identity Provider Unique ID GUID that was generated when you saved the record.
- Save.
{"RedirectUri":"https://{your domain}/ministryplatformapi/oauth/callback/[Identity Provider Unique ID GUID]"}
{"RedirectUri":"https://test.ministryplatform.net/ministryplatformapi/oauth/callback/2F7E65D6-080F-4ADA-96D0-5529EE8C5143"}Final Steps
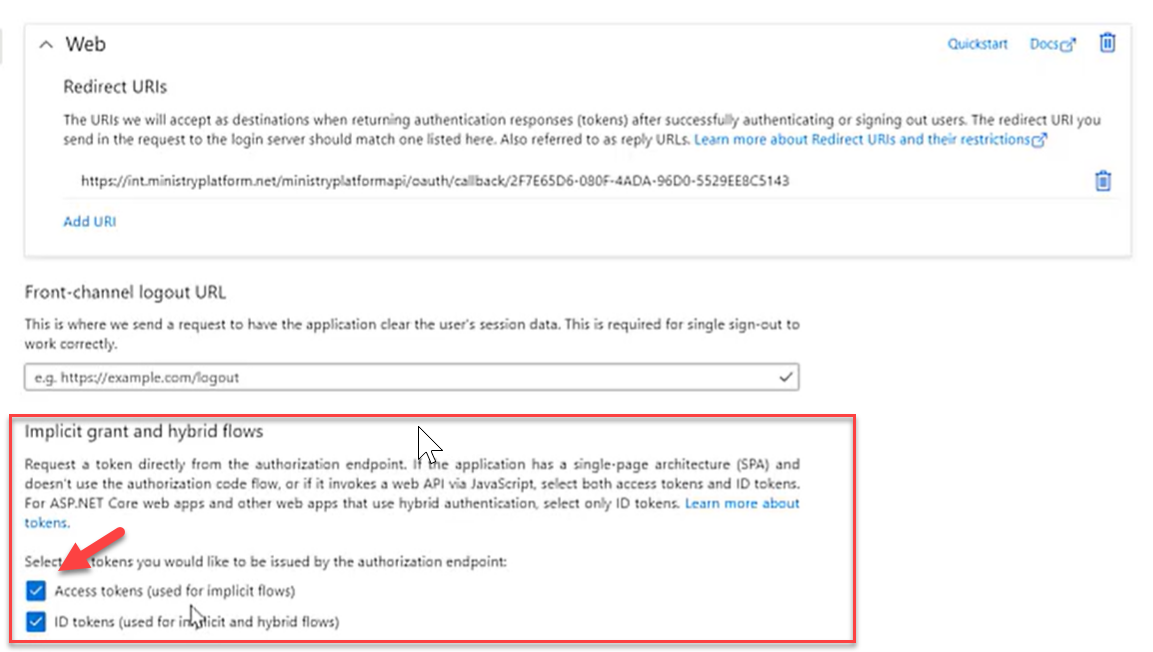
Add Your Redirect URI Endpoint to Azure
- Copy the Redirect URI Endpoint from the Settings field on the Identity Provider record in the Platform
- Default Directory > Overview > Redirect URI > Click on value to update
- Paste the Redirect URI Endpoint you copied from the Platform. The Redirect URI in Azure should match the Redirect URI Endpoint in the Platform.
- Enable Access tokens (used for implicit flows)
- Enable ID tokens (used for implicit and hybrid flows)
- Save
Create & Add Your Client Secret
- Azure > Default Directory > Overview > Client Credentials
- Click Add a Certificate or Secret
- New Client Secret
- Description: Your Church Name
- Expires: 24 Months
- Add
- Copy the value GUID
- Platform > Administration > Identify Providers > Azure AD
- Edit
- Paste the Client Secret you copied from Azure into the Client Secret on the Identity Provider record.
- Save
Restart the Auth App
- Platform > User Account (click on your picture in the upper right corner)
- Select Restart Auth App
Confirm the Azure AD Option Appears
Once complete, a button for Azure AD will appear on your Platform login page.
