The Verified First Integration works with the Platform to facilitate and automate everything you need for Background Checks.
Overview
With this integration, you can connect the Platform with Verified First's background screening solution. After it's set up, you can request a background check using the Background Check Request Tool in MinistryPlatform. That request is sent to Verified First using the credentials set up in your configuration settings.
Once Verified First has the results for your background check request and you have approved it in the Verified First client portal, the records are updated in the Platform. Finally, the nightly routine updates the relevant dates for you, including Background Check Submitted, Background Check Returned, and Background Check Expires.
Managing Background Checks
To manage background checks, see Background Checks.
Note: You must process background checks for Drug Screening and I-9 Employment Eligibility via the
Verified First client portal. You cannot
use the Background Check Tool for these requests because they require written justification.
Cost
There is no cost from ACS Technologies to use the Background Check Request Tool; it is included as part of your MinistryPlatform package.
Fees from Verified First will be assessed as per each church's individual contract agreement.
Integration Setup
Before you can set up your integration, you must have an account with
Verified First.
Step 1: Set Up Verified First Account & Create Custom Packages
Contact Verified First to set up an account and create the packages you would like to have. You can customize these packages and have as many as you need.
Step 2: Set Up the Platform with Support, or do it yourself!
Submit a ticket to our Support team, letting them know you want to use Verified First for all your background check needs. Provide the Package Name (Background Check
Type) and Package GUID (Package Service Code, which can be pulled from the package URL) for each package you have with Verified First.
Or, you can complete the Platform setup yourself:
- Go to Lookup Values > Background Check Types.
- Click New.
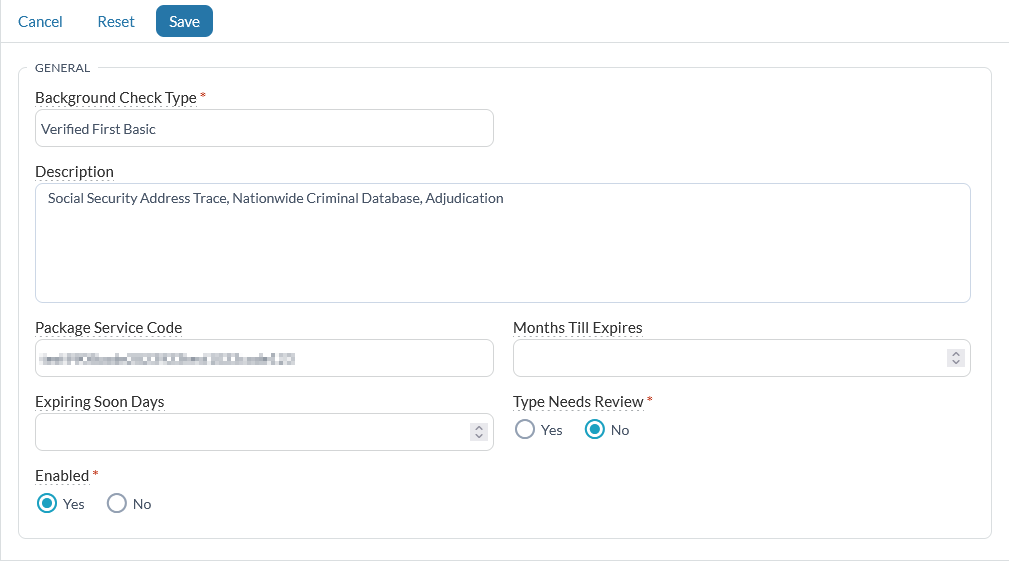
- Enter the necessary information:
- Background Check Type: The Verified First package name.
- Package Service Code: The package GUID in the package URL.
- Optionally, include:
- Months Till Expires
- Expiring Soon Days
- Needs Review
- Click Save.
- Repeat these steps for each separate package you want to add.
Step 2a: Adjudication (Optional)
All Verified First packages include adjudication except SSTrace + MVR. When MinistryPlatform receives a post back from Verified First with a status of "Complete" and an adjudication value of "Ready for Review", the status will be updated in the Platform,
but the All Clear field will still be undefined.
After a church staff member reviews and approves the report in the Verified First portal, Verified First sends another post back to MinistryPlatform with an
adjudication value of "Approved". At that point, the All Clear field will be updated to "Yes".
Step 2b: Prepare the Platform
- Go to Administration > Configuration Settings.
- Enter your Verified First credentials in the following settings:
- COMMON BackgroundCheckProvider - This should be "VerifiedFirst".
- COMMON BackgroundCheckUsername - The username provided by Verified First.
- COMMON BackgroundCheckPassword - The password provided by Verified First.
- COMMON BackgroundCheckOrderUrl - The endpoint URL provided by Verified First; this is where MinistryPlatform will send background check requests.
- TOOLS BackgroundCheckCallbackUsername - The username that Verified First will use to authenticate with MinistryPlatform for postback requests. You create this and supply it to Verified First.
- TOOLS BackgroundCheckCallbackPassword - The password that Verified First will use to authenticate with MinistryPlatform for postback requests. You create this and supply it to Verified First.
Step 3: Submit a Test
- Using the Add/Edit Family Tool, create these two Contacts in the Platform. (These contacts will be used by Verified First testing without incurring any charges.)
- This will return a sample report with records:
- First Name: Hank
- Last Name: Mess
- Email Address: Use your email address so you receive the background check request.
- This will return a sample report with no records:
- First Name: Joe
- Last Name: Clean
- Email Address: Use your own so you receive the background check request.
- Create a test submission to ensure the integration is working as currently configured.
- Select your test Contacts (Hank Mess and Joe Clean).
- Launch the Background Check Request Tool from a selection or record. Or launch the toll and search for your test records inside the tool.
- Set the Background Check type.
- Select the Ministry (optional).
- Add notes to the Notes field (optional).
- Click Submit to create the background checks and submit them to Verified First.
- You'll receive an acknowledgment that you've submitted it successfully.
- Confirm a record has been created on the Background Checks page.
- After you receive the email requests, click the link and enter each Contact's fictional information. Pro tip: The fictional information can be obtained from Verified First's testing documentation.
- Follow the link provided on the Background Check record to review and optionally approve the report.
- Confirm the results have populated on the Background Checks page.
If you need assistance with any of these steps, contact our Support team.
See Also
