In the Check-In Kiosk, Users can search by:
A minimum of 3 characters must be entered into the Search box in order to return search results (e.g. "Chr" or "C,M"). If your Household ID is less than 3 numbers, add preceding '0' zeros as needed.
The search results will return to the Search screen if no action is taken within 30 seconds.
Expected Participants and Guests display in search results based on the Search Results option selected on the Event Record.
In both attended and unattended mode, this option displays all members of a household and allows all to be checked in for an event regardless of whether they are expected or a guest.
In both attended and unattended mode, this option displays all members of a household, but allows only those expected to check in for the event.
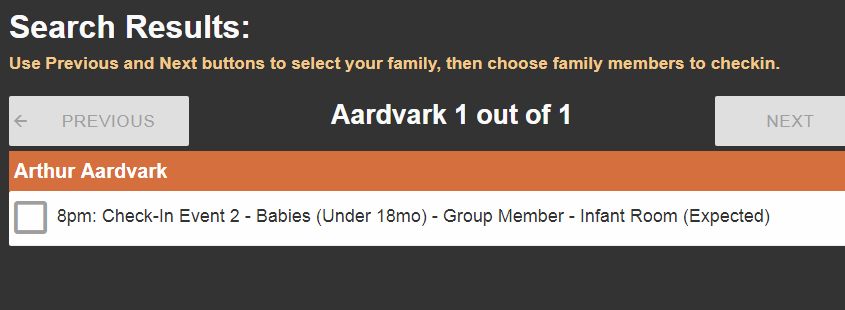
In unattended mode, this option displays only those expected and allows them to check in for the event. In attended mode, this option looks and functions like the Allow Expected Only (Show Everyone) option.
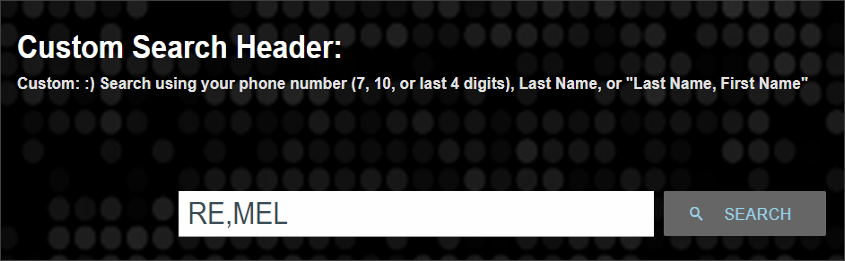
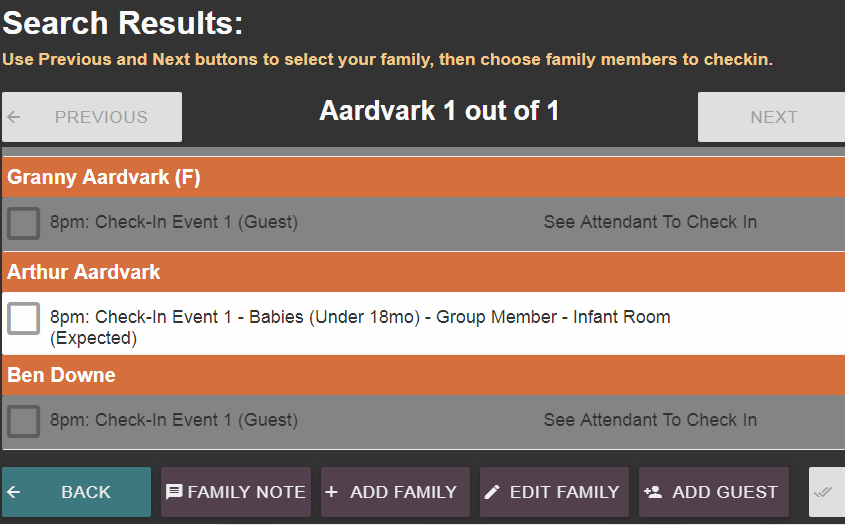
Once you've searched, search results are listed by family. If multiple families meet the search criteria, a Next Family button appears; use the Next and Previous buttons to navigate between families.
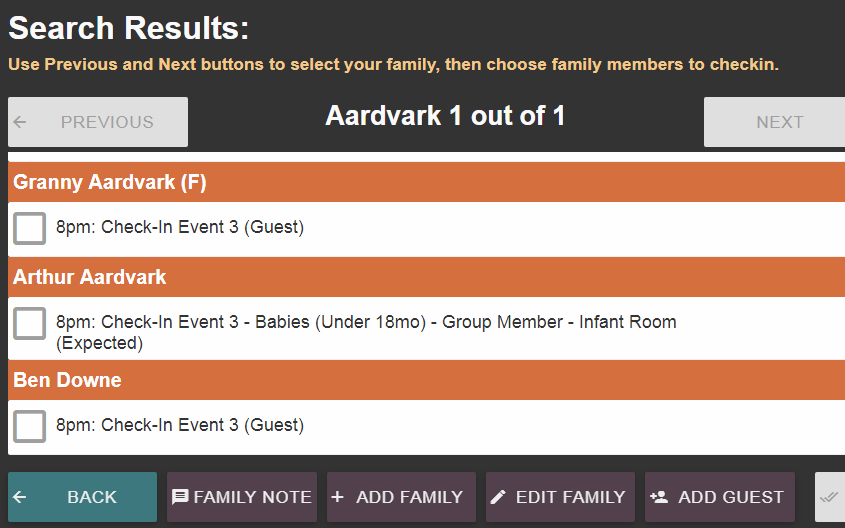
Participants who are qualified to check in (i.e. have an Event Participant or Group Participant record related to the Event) will be able to check in. Other Participants who display in the search results but are not registered/expected may appear grayed out in their Household depending on the Search Results field of the Event. If grayed out, they will be shown with the message: "See Attendant To Check In". Also, depending on the Search Results field, unexpected Participants may be hidden altogether.
To limit results, we recommend that you search by phone number or ID. Check-In Kiosk returns results much faster with these search options because the possible matches are constrained.
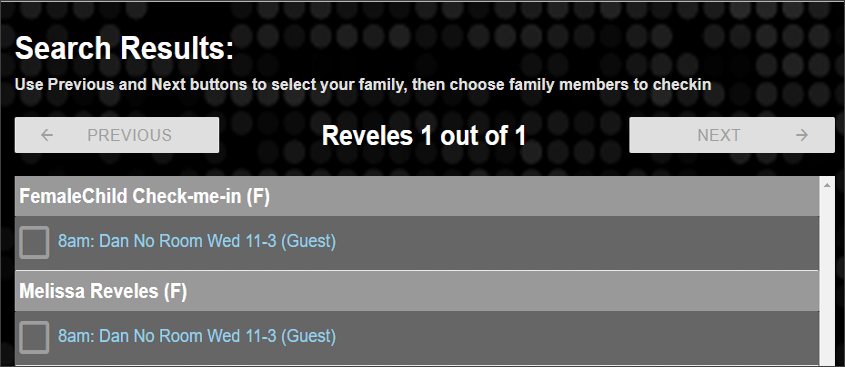
To check in, select the rows for each family member that should be checked-in, and then click either Print (if the session is configured to print name tags) or Check In (if the session is configured with "Do Not Print" selected).
A person can check in to multiple Events at the same time (for example, the 8:00 AM Worship Service and the 9:45 Leader's Meeting). Select the desired Events to check in to. Someone may also check in to multiple Rooms & Groups for the same Event (for example, the 9:00 Service - Setup Team and the 9:00 Service - Greeters Team).
If a person is registered for an Event and associated with the Event via Rooms & Groups, the information may be condensed into one row if the Event Participant has a matching Group Participant value defined. In this case, the search result would display Group Name - Group Role - Room (Registered). Please note that we do not recommended explicitly adding Group Participant values to Event Participant records but these may be populated automatically (e.g. during Registration).
If the Contact Status of the individual who checked-in is Inactive, the action of checking-in will not change their Contact Status to Active. Their Contact Status remains unchanged. Use a Fix View to review and update Contact Status, if desired.
Participants will no longer be able to check in to Events when the Late Check In period has come to an end and does not take the End Date/Time into consideration.
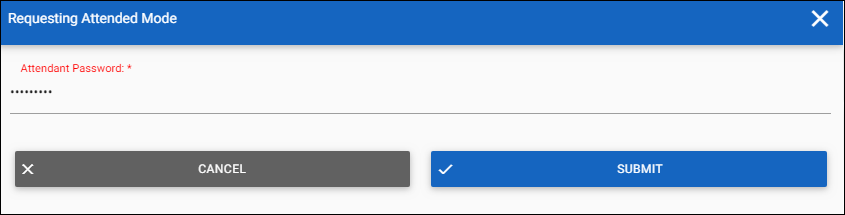
To temporarily switch to attended mode for one search, enter "*" in the Search bar to bring up the Password Prompt. Then, enter the attendant password and click Submit. After the search and any edits have been made, the station will revert back to unattended mode functionality.
This is helpful for "floating" volunteers to be able to add or edit a Participant without having to stay at one attended station. This also allows the User to get to the Home and Kiosk Settings in case something needs to be changed.
Searching in this mode returns all members of a household regardless of whether they are expected or a guest. Once you've searched, the results are listed by family. If multiple families meet the search criteria, a Next Family button appears; use the Next and Previous buttons to navigate between families. To limit results, we recommend that you search by phone number or ID. Check-In returns results much faster with these search options because the possible matches are constrained.
In order to use Attended Mode the User must have the Check In Attended Mode, or Check In Administrator Security role. If the User does not have one of these Security Roles, the station will not be in Attended Mode even if Force Unattended Mode disabled.
If you don't see the family or individual you're looking for, use the Add Family or Edit Family buttons available at the bottom of the screen.
To check in, select the rows for each family member that should be checked-in, and then click either Print (if the session is configured to print name tags) or Check In (if the session is configured with "Do Not Print" selected).
A person can check in to multiple Events at the same time (for example, the 8:00 AM Worship Service and the 9:45 Leader's Meeting). Select the desired Events to check in to. Someone may also check in to multiple Rooms & Groups for the same Event (for example, the 9:00 Service - Setup Team and the 9:00 Service - Greeters Team).
Attended Mode permits check in for the duration of the Event and does not consider the Late Check-In Period. Participants will no longer be able to check in to Events once the Event End Date/Time has passed.
If the Contact Status of the individual who checked-in is Inactive, the action of checking-in changes their Contact Status to Active. However, if they checked-in as a guest, their Contact Status remains unchanged.*
To re-print labels, simply search for and check in the event participant again. A new set of labels will print. The original labels should be discarded.
When using Check-In Kiosk a Participant will appear differently in search results based on how the Event, Group and Rooms are set up in the Platform. See Searching Event Participants for details.
