The Printer Mappings area of the Admin Console section of the Check In Suite application allows you to see and modify printer mappings for name tag printing with the Check-In Kiosk. Based on the Rooms in scope of the Check-In Suite Home settings, the list will show:
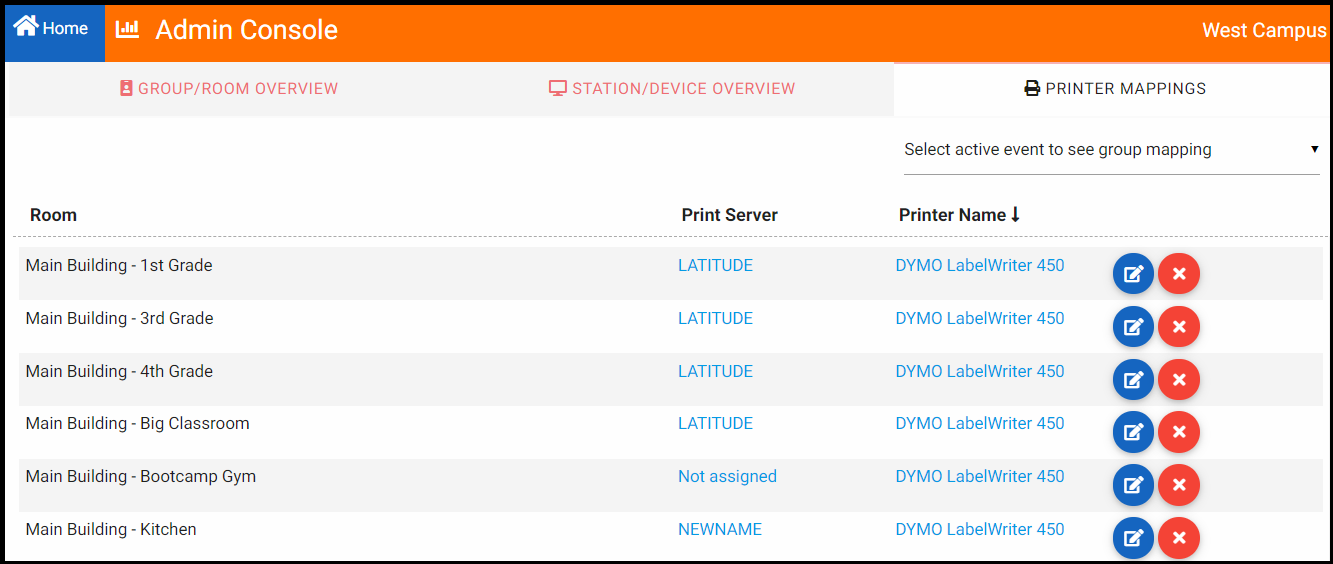
To filter the list to see only mappings related to one specific Event, select the desired Event in the "select active event to see group mapping" drop down. To sort the grid by Room, Print Server, or Printer Name, click the desired column header.
The list of available Print Servers is determined by Printer Server records in the Platform (Lookup Values > Print Servers). These are created when the Print Service is installed and verified on a machine. In this context, a "Print Server" is a machine that has the Kiosk Print Service installed, verified and running.
To edit a mapping, from the Check-In Suite Admin Console, go to Printer Mappings. Click the pencil icon and change the Print Server and/or Printer Name.
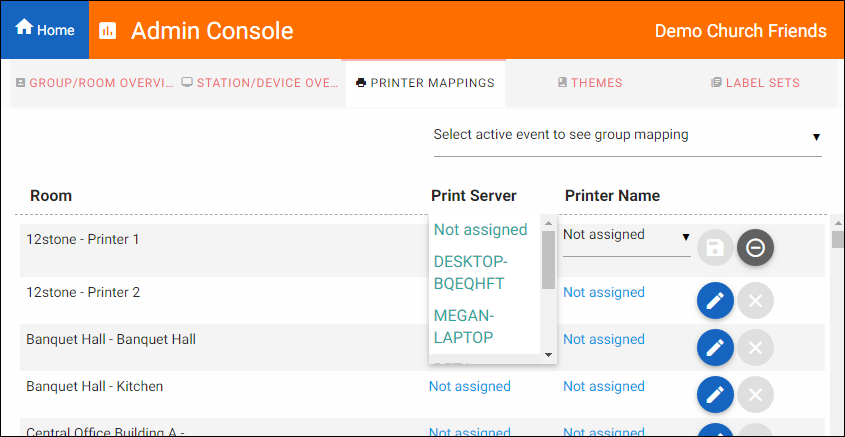
To unassign a mapping, from the Check-In Admin Console, go to Printer Mappings. Click the "X" icon and unassign the printer from the Room and Group.
