For All Printers
- Set As Default:
- At the check-in workstation, navigate to the printers folder by either:
- Windows 10 & Windows 11: Click Windows Start > Settings > Devices > Printers & Scanners.
- Other Versions: Start > Control Panel > Printers.
- Right-click the Label Printer, and choose Set as Default Printer.
- Set Orientation:
- Right-click the Label Printer, and choose Set Printing Preferences.
- Change the Orientation to Landscape.
- Set Paper Size:

- Click the Advanced button.
- Set your Paper Size to the proper label media type. This is typically a 5-digit label number followed by Shipping. You should be able to find the label number information on the back of the label media or in the packaging for your labels.
- Follow the additional steps below for your printer type.
Additional Steps for Zebra Printers
If your Zebra Printer is not cutting as desired, try installing
this custom installer on the machines experiencing the printing issues. After it's installed, configure your cutter using Configure Cutter: Option 3 below.
After you've completed the steps to set the printer as the default printer, follow these additional steps specific to Zebra printers.
Local Administrator
You must complete these steps as a local administrator in order for the settings to stick. This specifically means a local User on the machine, not a domain user.
Change Properties
This step enables the "Printing Defaults…" button referred to in the next step.
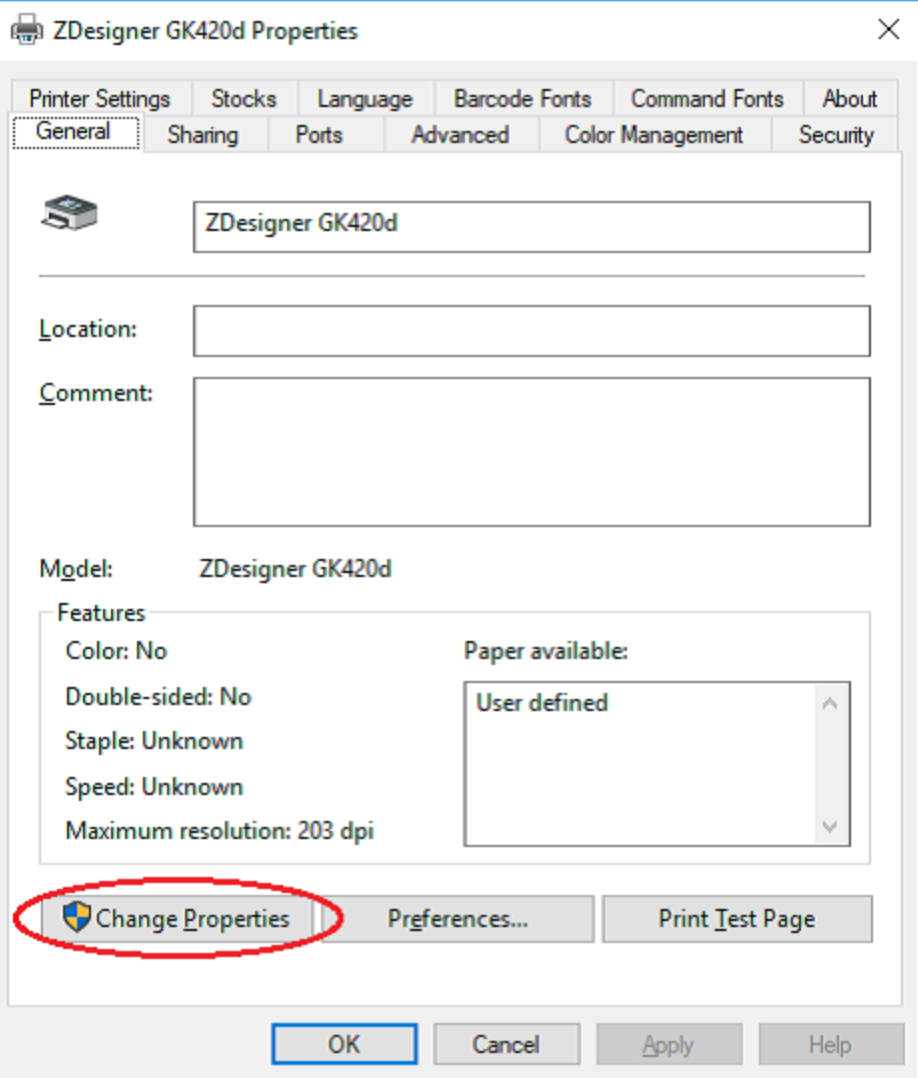
In Devices & Printers:
- Right-click the Zebra printer, and select Printer Properties.
- Select the General tab.
- Click "Change Properties", and the printer properties dialog box will close and reopen with administrative privileges.
- If you do not see the "Change Properties" button, it means you already have administrative privileges, and you can move to the next step for setting default orientation!
Default Orientation
In this step, you'll set the printer orientation.
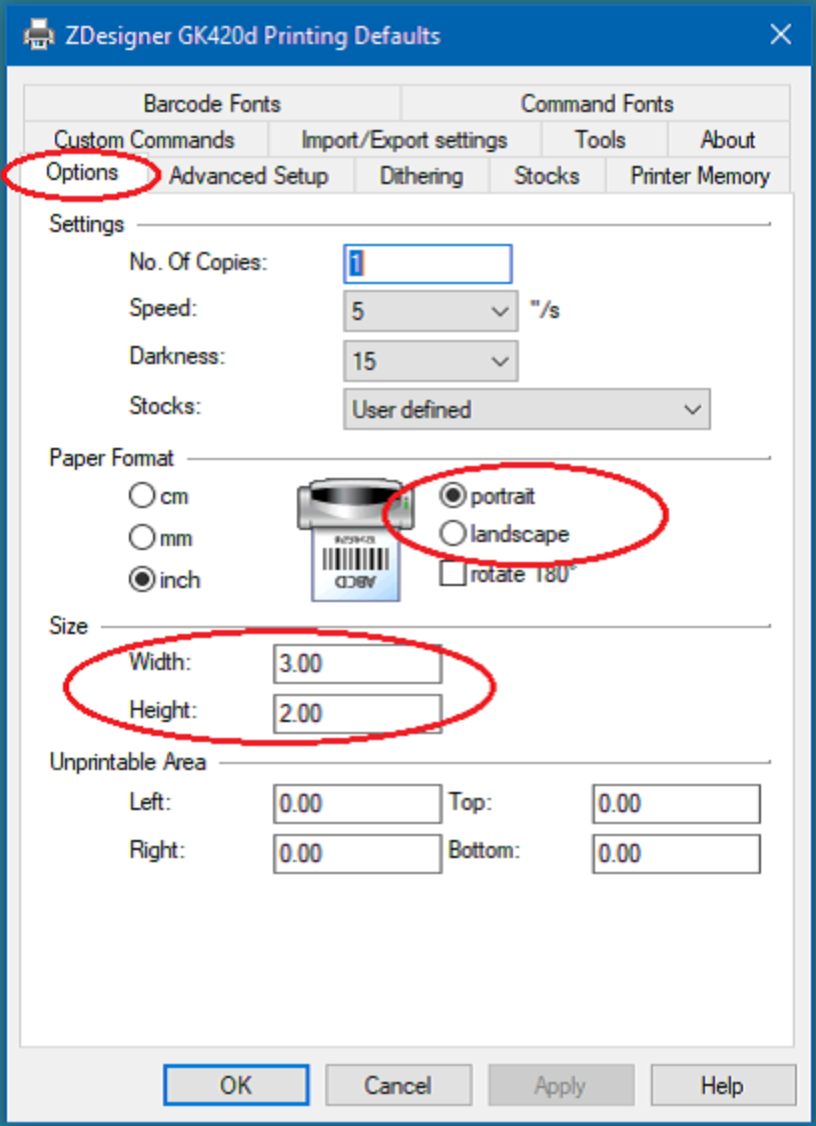
- Select the "Options" tab.
- Select the default orientation.
- Specify your default label size.
Configure Cutter: Option One
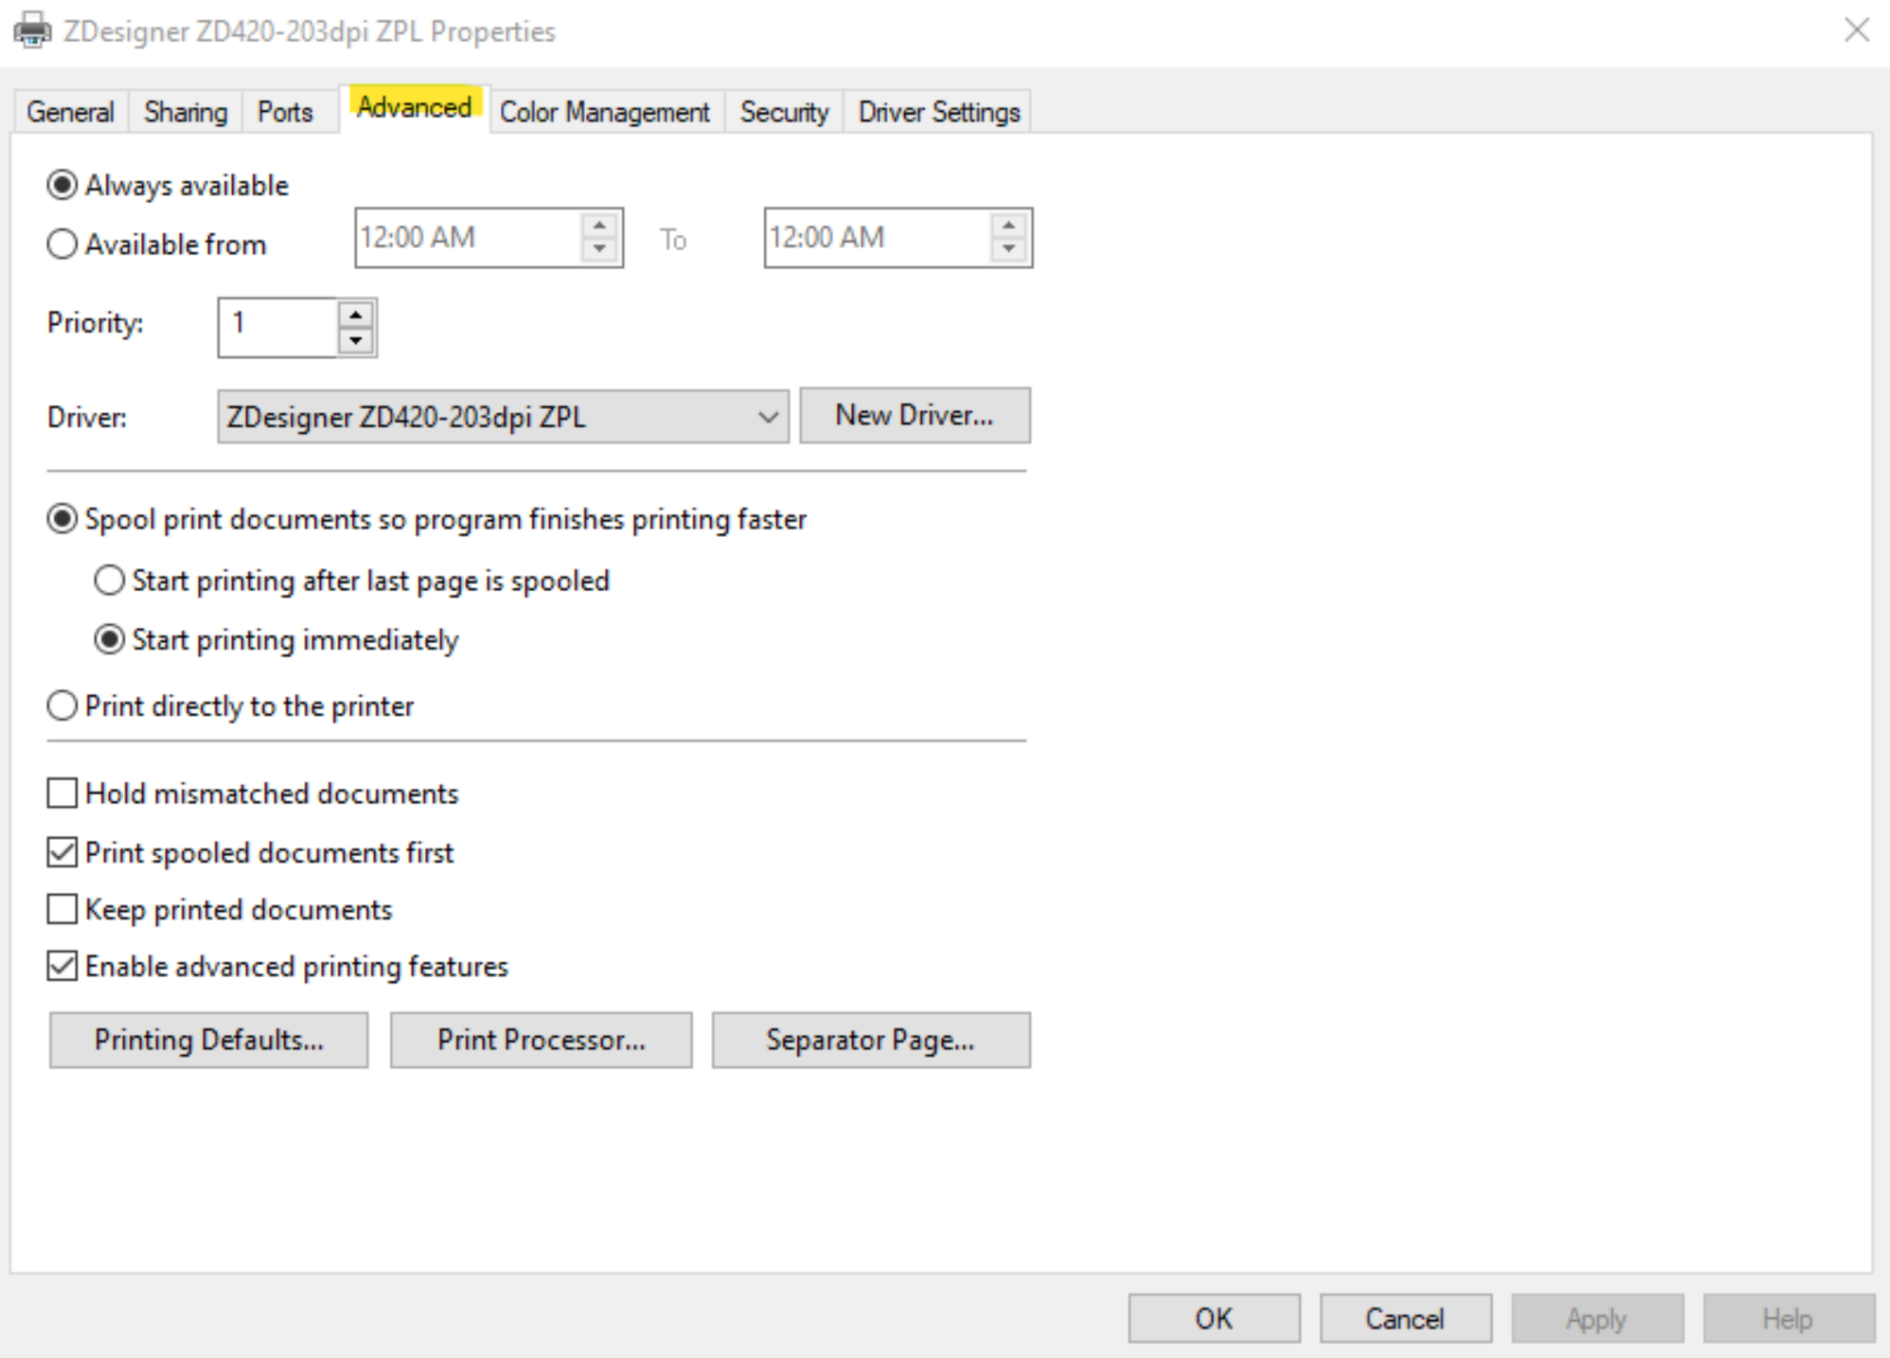
This step must be done on the Advanced Tab and will set up your printer to cut after all of the Household labels have been printed, rather than between every label.
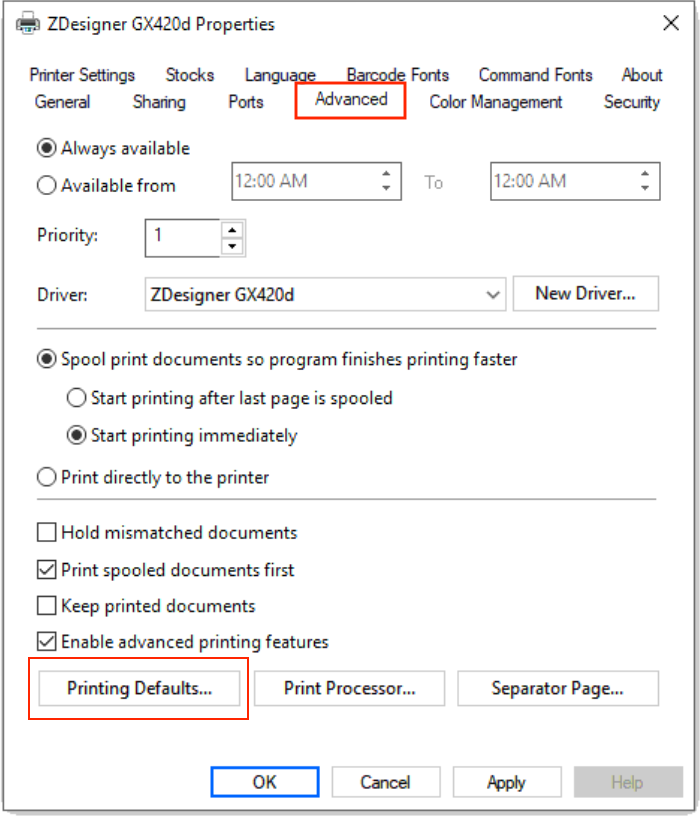
On the "Advanced" tab:
- Click "Printing Defaults…" button. If this button is not enabled, see the previous step. This will open the Printing Defaults dialog.
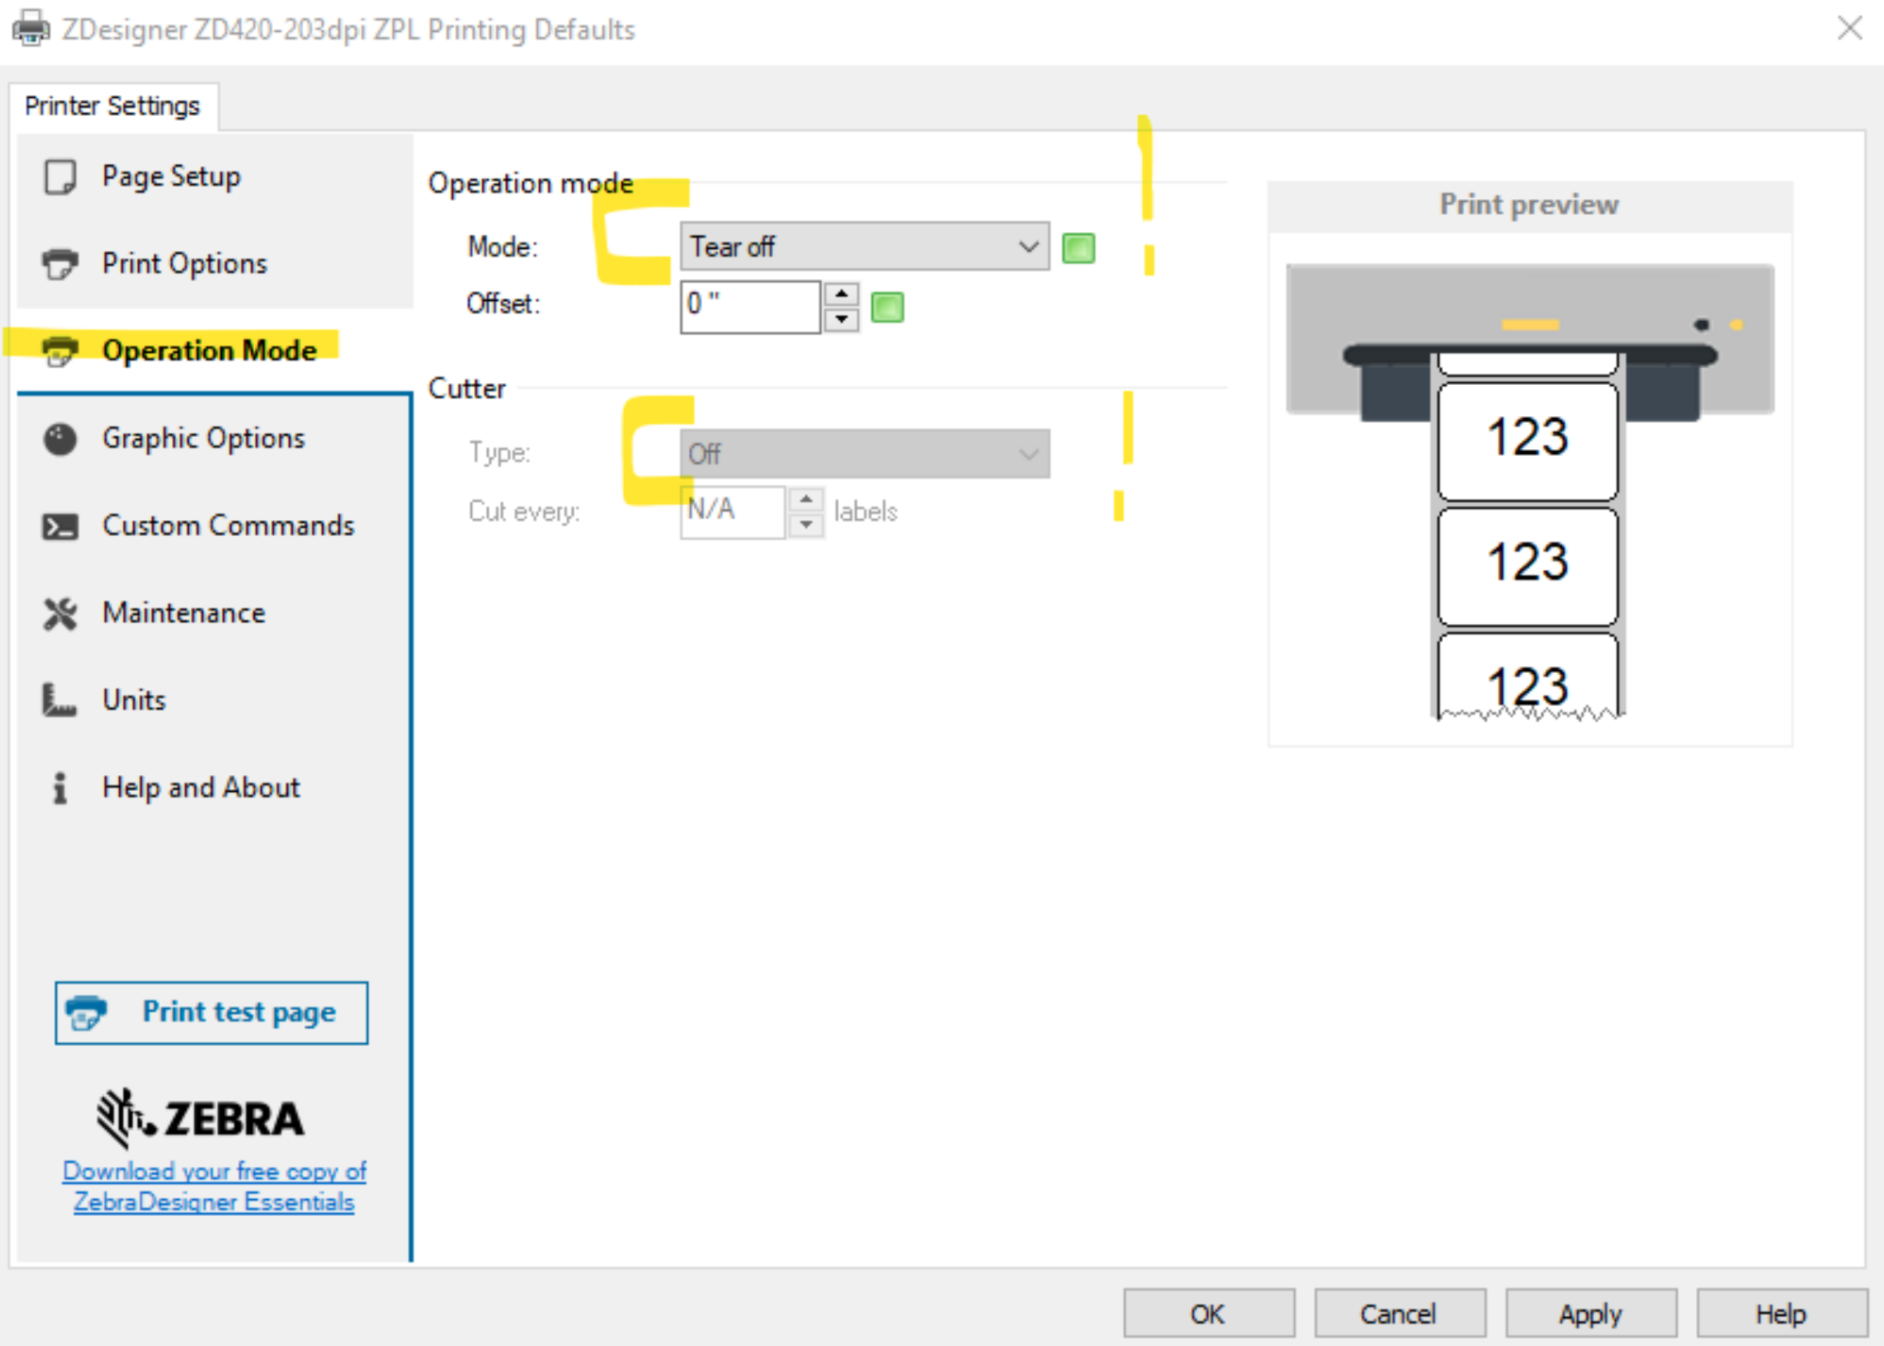
- Select the "Operation Mode" tab.
- Select "Tear Off" from the Mode drop-down menu. This will allow Check-In Suite to manage the cutting process.
- Set Offset to 0".
- Select "Off" from the Cutter Type drop-down menu.
- Select "OK".
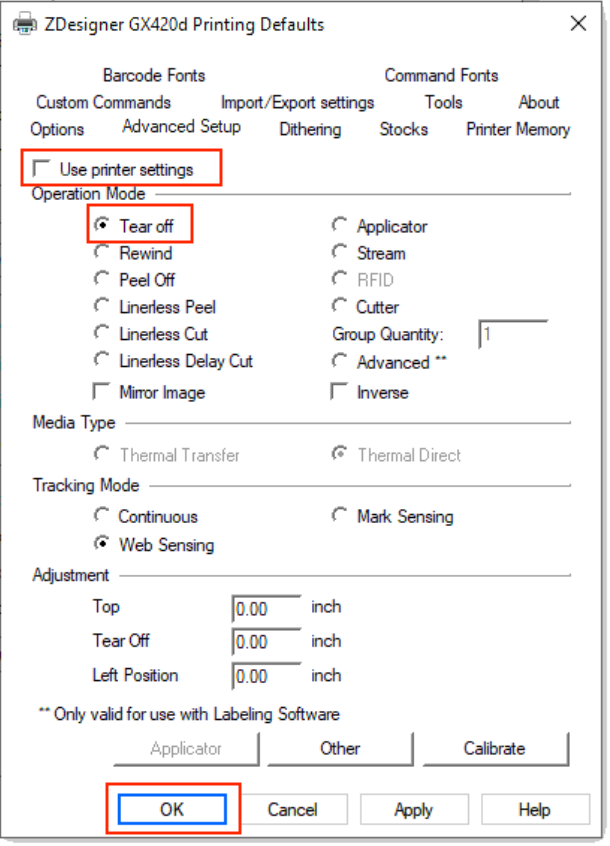
Configure Cutter: Option Two
If your Zebra printer properties look different than the ones above, these directions are for you! This step must be done on the Advanced Tab and will set up your printer to cut after all of the Household labels have been printed, rather than between every label.
On the "Advanced" tab:
- Click the "Printing Defaults…" button. If this button is not enabled, see the previous step.
- This will open the "Printing Defaults" dialog.
- Uncheck "Use Printer Settings".
- Check "Tear Off". This will allow Check-In Suite to manage the cutting process.
- Select "OK."
- Return to Check-In Suite and check in a Household that will print more than one label. The labels should be cut after the entire Household (rather than between each able). If there is a lag between printing each label, complete the rest of these steps.
- Return to the Advanced tab.
- Click the "Printing Defaults ..." button. This will open the "Printing Defaults" dialog.
- Check the "Use Printer Settings" box.
- Select "OK".
Configure Cutter: Option 3
If you installed the custom installer, these cutter configuration instructions are for you! This will set up your printer to cut after all of the Household labels have been printed, rather than between every label.
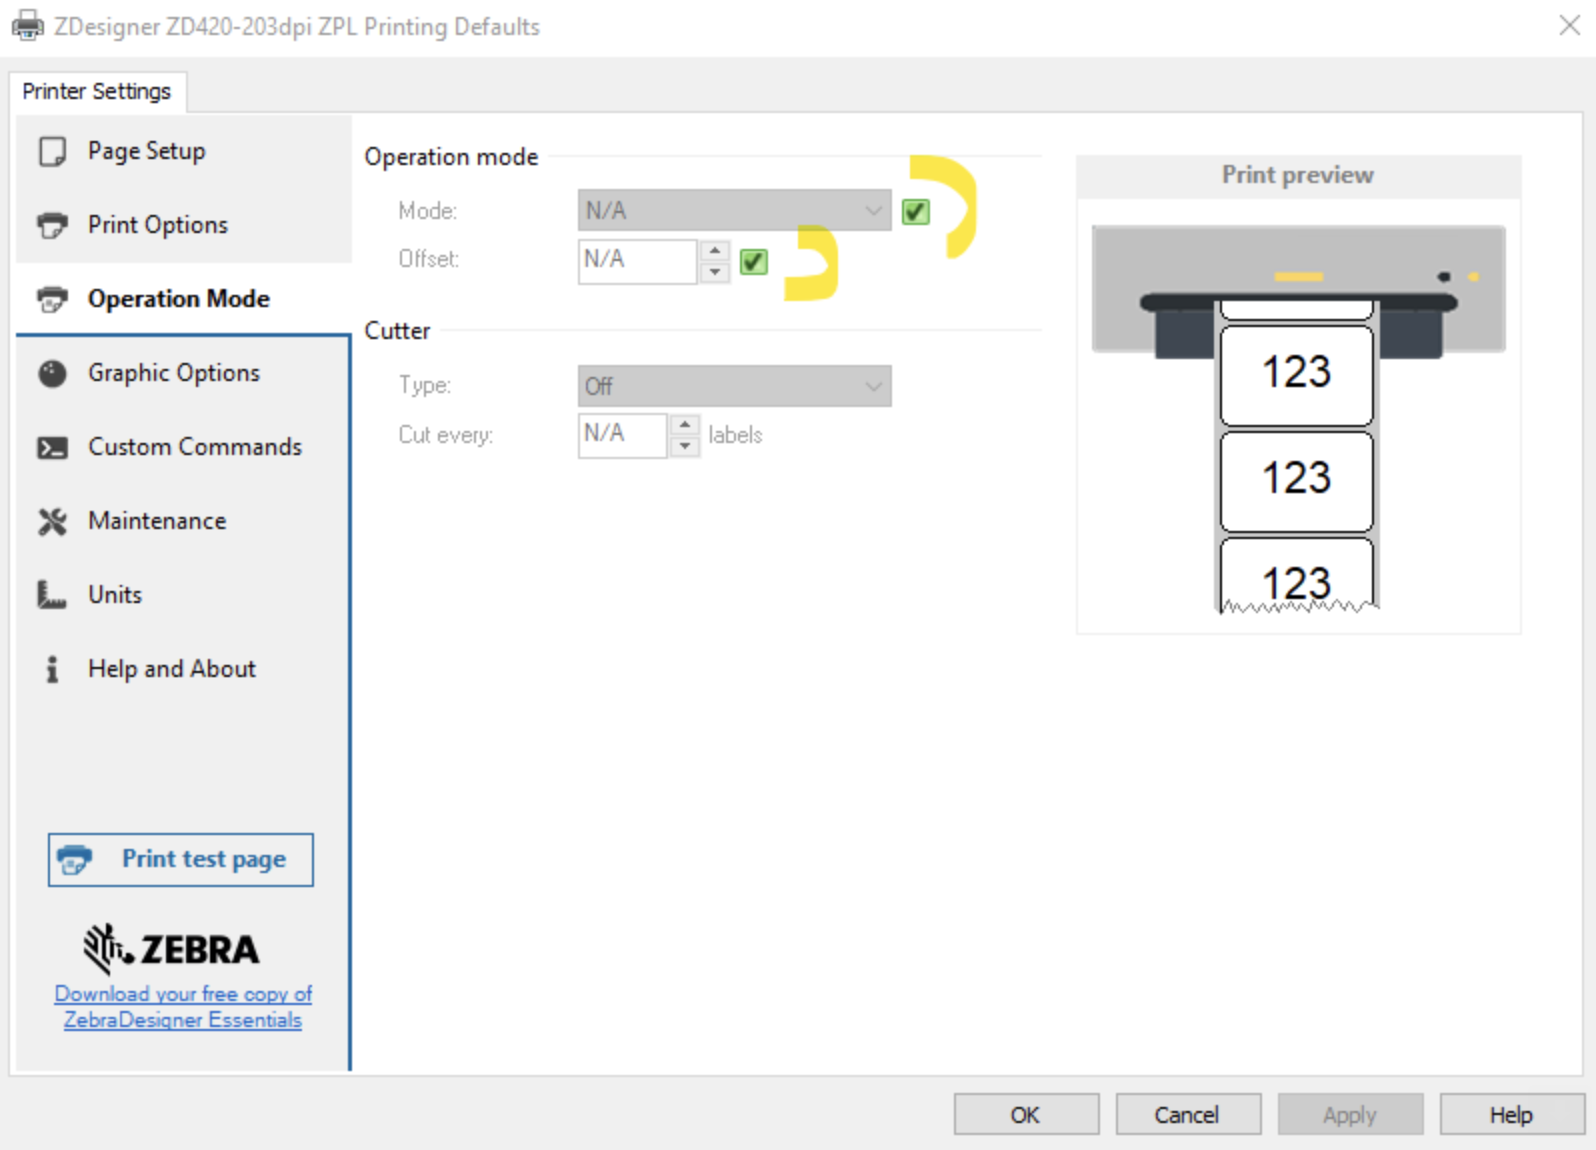
On the "Printer Settings" tab:
- Select the Operation Mode tab.
- Set Mode to "N/A".
- Check the "Mode" box.
- Set Offset to "N/A".
- Check the "Offset" box.
- Set Type to "Off".
- Set Cut every to "N/A".
- Select "OK".
Cutting Troubleshooting
If your cutter is not cutting, you might need to reinstall the driver from the device manager.
Note: Due to Zebra driver limitations, in order to cut, these printers require that the Print Service run on a machine with Windows 10 or 11 (print server or local machine).
- From Device Manager, right-click and choose "Uninstall device".
- If prompted, check the box to "Delete the driver software for this device", then click "Uninstall".
- Reinstall the driver per manufacturer instructions.
- Set driver settings to correct label size and to "Use printer settings." See detailed steps above.
- Select the printer again in the Check-In Kiosk settings dialog.
In Windows 10, use the Print Management Console to access and edit printer/cutter settings rather than the Settings > Devices > Printers and Scanners panel. The Devices folder does not open with Administrative privileges by default, even if the user account is a member of Administrators.
Additional Steps for Dymo Printers
After you've completed the steps above to set the printer as the default printer, follow these additional steps specific to Dymo printers.
Local Administrator
You must complete these steps as a local administrator in order for the settings to stick. This specifically means a local User on the machine, not a domain user.
Calibration, Sides, Sizes
- The printers must be calibrated, as the labels likely won't print correctly until calibration is run inside printer properties.
- If using a dual-label printer, only one side can print labels at a time. Check-In Kiosk does not have the ability to print to two different sides at the same time. When one side runs out of labels, the other side will start printing.
- Remember the label sizes on each roll must match. You can not have one roll with one size and the other roll be different.
Settings Applied to All Users
Ensure the correct label size is selected on the Advanced Settings tab (see step C above), as this tab is what sets the correct size for all users.
Additional Steps for Brother Printers
After you've completed the steps above to set the printer as the default printer, follow these additional steps specific to Brother printers.
Local Administrator
You must complete these steps while logged in as a local administrator in order for the settings to stick. This specifically means a local User on the machine, not a domain user.
Print Size
Make sure the print size is set as the default for all users.
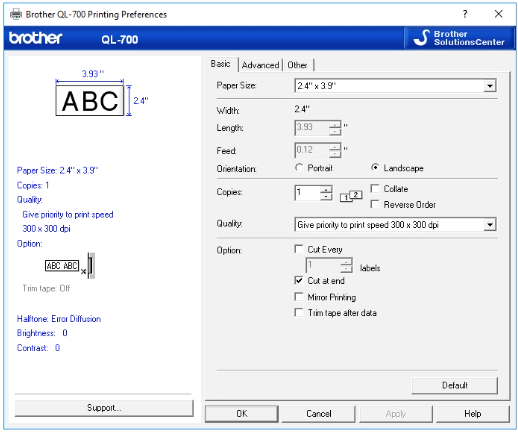
Paper Size
- Ensure that the default printing preferences are set with the Paper Size as your exact label size.
- Select the correct paper size by navigating to Printer Properties > Advanced > Printing Defaults > Paper Size.