Your Knowledge Base is moving on 3/25/24! Our new Help Center provides all the articles you know and love (plus so much more) in a one-stop shop. Ask your SPoC for details!
The Label Sets area of the Admin Console section of the Check-In Suite application allows you manage, edit, and create name tags for your Check-In Kiosk.
Check-In Suite comes with four pre-loaded "default" label sets that you are welcome to use or edit!
Note: Only label sets created in the Check-In Suite Admin Console can be uploaded for use and editing. Label sets created outside of Check-In Suite will not function properly and can lead to an error with the Label Set drop down menu.
Label Types
There are five labels types available for each Label Set:
Summary Label: This label will print a single summary labels for all participants checked in if they are also receiving a Secure label (label with a security code token). See Label Design for details.
Group Participant Labels: These labels will print if the Participant checking in is in a Group associated with the Event and has a Group Role Type of Participant.
Group Leader Labels: These labels will print if the Participant checking in is in a Group associated with the Event and has a Group Role Type of Leader.
Group Servant Labels: These labels will print if the Participant checking in is in a Group associated with the Event and has a Group Role Type of Servant.
No Group (RSVP) Labels: These labels will print if the Participant checking in is not in a Group associated with the Event.
Add a New Label Set
Click New.
Name your Label Set.
Choose your label dimensions.
Click Submit.
If needed, change the orientation. (Default: Landscape)
If you have a Zebra printer with a cutter, the Print Service is running on a machine with Windows 10, and you have configured the print properties to cut, check the Cutter box.
Click Save.
Under the desired Label Type, click Add (+).
Name your label with a unique name.
If applicable, map your label to a specific Group or set of Groups.
Create your label adding the desired text, font, tokens, etc. See Label Design for details on options.
Review the Print Preview to see an example of your label. Tip: The preview is a content preview, not a formatted preview. Print labels to preview/test formatting.
Click Save.
Repeat as needed adding the desired labels for each Label Type. Tip: Click the Copy icon next to an existing label to copy the label to be tweaked.
Edit Existing Label Set
Select the desired existing label set from the list of installed label sets.
Under the desired Label Type, click Add (+).
OR, click the Copy icon next to an existing label to copy an existing label.
If needed, change the label type. Note: Once created, you cannot change the label size on a Label Set. If the size needs to be changed after being created, create a new Label Set.
If applicable, map your label to a specific Group or set of Groups.
Create or modify your label by adding the desired text, font, tokens, etc. See Label Design for details on options.
Review the Print Preview to see an example of your label. Tip: The preview is a content preview, not a formatted preview. Print labels to preview/test formatting.
Click Save.
Repeat as needed adding the desired labels for each Label Type.
Note: If you are prompted to Save a label when you don't feel you've made any changes, the label editor is correcting poorly formatted HTML upon loading the label. Saving is recommended.
Copy an Existing Label Set
Download the Label Set
Rename the file
Upload the Label Set
Delete Existing Labels and Labels Sets
Delete a Label Set (All Labels in Set)
Select the desired existing label set from the list of installed labels sets.
Click Delete. (under the Label Set name and Size settings)
Confirm Delete.
Delete a Label From a Label Set
Select the desired existing label sets from the list of installed label sets.
Scroll to the specific label to delete.
Click Delete. (the trash can icon next to the specific label)
Confirm Delete.
Upload and Download Label Sets
You can download a label set to share with other MP churches by:
Select the desired existing label set from the list of installed label sets.
Click Download.
Share the zip file as desired. Note: Safari may not download the labels automatically in a .zip. To change this, in Safari go to Preferences and under the General Tab, uncheck the option Open “safe” files after downloading
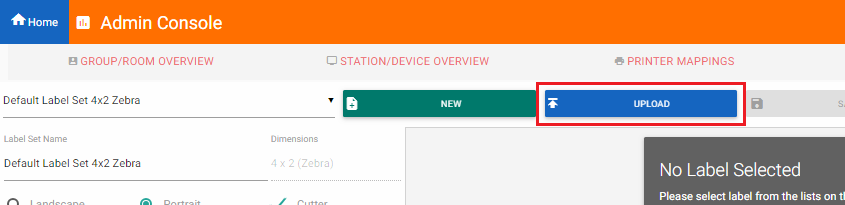
You can upload a label set if it was originally created by in the Check-In Suite Admin Console.
Click Upload.
Browse to the desired label set zip file.
Click Open.
Edit, if needed.
Notes About Label Sets
Only label sets originally created by in the Check-In Suite Admin Console can be uploaded for use and editing.
You can have as many label sets as you desire.
A label set can have labels defined for one, multiple or all label types.
A label type can have no, one, or multiple labels defined.
If a label does not have Groups mapped, that label will print for any Group Participant with that label type (participant, servant, or leader).
If a label does have Groups mapped, that label will only print for a Group Participant in one of those Groups and with that label type (participant, servant, or leader).
When the cursor is in a repeating section, you are presented with a red line and a small menu giving you the option to insert a paragraph after the section. You cannot just click below it unless another section already exists.
Check-In Suite comes with 4 pre-loaded label sets that you can edit or copy as desired.
You can engage Professional Services to recreate existing label sets from Check-In 2 in the new Check-In Suite. Hourly rates apply.
Reminder: Label sets are custom to your system (similar to custom views). Emailing Support to troubleshoot issues with custom label sets will require you to engage Professional Services. Hourly rates apply.
Video Topics: Configuring Labels
0:15 - Security Roles for Check-in Suite 0:43 - Working with Secure tags 2:03 - Working with Non-Secure tags 2:20 - Label Preview 2:40 - Creating a new name tag 3:24 - Creating a new label set
When autocomplete results are available use up and down arrows to review and enter to select.