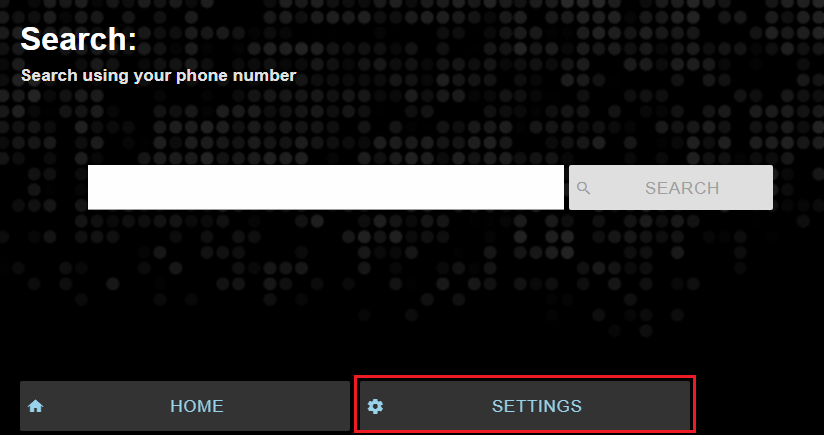
When you launch the Check-In Kiosk, it goes straight into search mode. Click the Settings button to update the Theme, choose the Keyboard, change the amount of time before showing a confirmation message, make selections for searching and printing, or
grab the auto URL. We recommend adding a home screen shortcut on the kiosk device for quick access when you need to launch it.
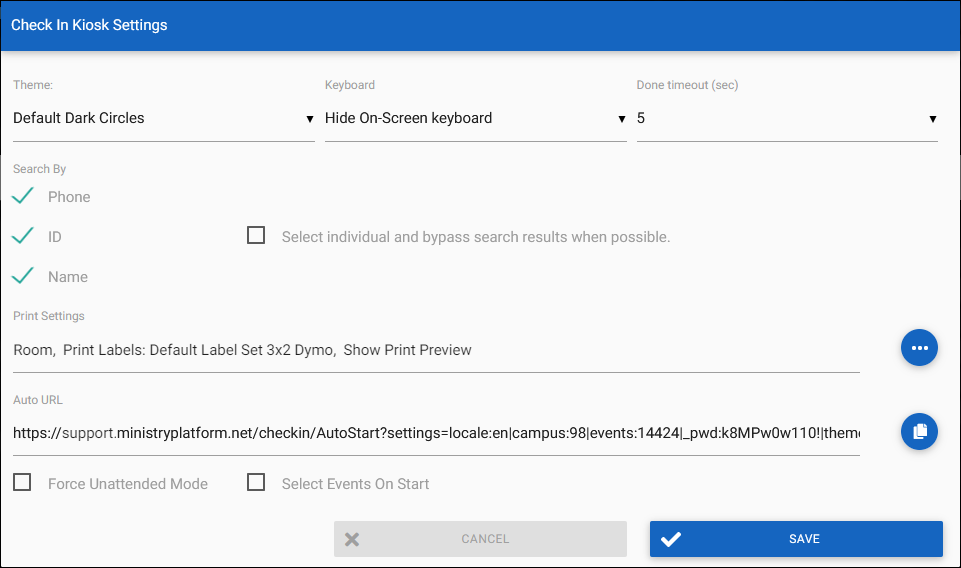
Theme
Choose the desired theme, which controls the background image and colors for buttons and fields. You can add or modify themes in the Admin Console.
Keyboard
Choose your desired search keyboard:
- Hide on-screen keyboard
- Full keyboard
- Number Pad
- You always have the option to toggle between the full keyboard and number pad. The setting controls which one is the default for the session.
- If you're using an iPad, we recommend selecting the onscreen keyboard or number pad option. This suppresses the native iPad keyboard, making user navigation and data entry much easier!
- If using an iPad with iOS version 13.1.2, we recommend setting the Settings > Safari > Request Desktop Website > All Websites setting to OFF to prevent the native keyboard from popping up.
Done Timeout
After someone checks in, they see a countdown before the kiosk returns to the Search screen. You can select a Done Timeout option of between 1 and 10 seconds, with the default being 5 seconds. If you want people to move along quickly
after checking in, you might choose a shorter time (like 1 second). You might choose a longer time (like 10 seconds) if you need people to wait while their labels are printing.
Search By
Any combination of the following search methods can be toggled on or off. Pre-Check codes
work with any method and continue working if no methods are enabled. Learn more about
how search results are displayed for each method.
- Name
- Phone
- ID
- Select individual and bypass search results when possible: If selected, returns exact matches only. If there is only one Contact with the exact ID, the person is automatically checked in and labels are printed automatically, if applicable.
Print Settings
Choose the desired print settings:
- Print Labels: Select to use Check-In Kiosk with the ability to print name tags.
- Specific Printer: For printers to be available for selection, the station must have the Print Service installed. See Print Service for setup.
- Room: For printers to be available for mapping, the
remote print server must have the Print Service installed. See Print Service for
setup.
- Enable Default Printer: If selected, you will have the option to select a printer for RSVP-only Participants checking in that are not associated with a Group (thus, have no Room mapped). If not configured, RSVP labels will
not print.
- Print Server and Printer Name: Select [LOCAL PRINTERS] for a list of local printers connected to the station, or select a printer server. Then, select the desired printer.
- Label Set: Select the desired label set (name tags) from the drop-down of available templates. Label Sets can be added or modified in the Admin Console.
- Show Print Preview: Select for the User to see a preview of their name tags before they are printed. Clear for labels to print without a preview.
- Do Not Print: Select to use Check-In Kiosk without name tags.
- Print Test Label: When you're in Attended Mode, click this button to make sure the label format is correct and your printer is working before you print the labels. This is helpful when you need to add a new printer, check changes
made to labels, or your printer jams in the middle of printing.
Auto URL
After making all other selections, click the Copy icon next to this field to copy a read-only URL that you can use on other workstations to:
- Automatically logs in as the Auto Login User. To assign the Auto Login User, set the appropriate values in these Configuration Settings:
- CIM, AutoLoginPassword
- CIM, AutoLoginUsername
- Load the same Home Settings and Check-In Settings (above)
- Force Unattended Mode: AutoURL will use the rights of the Auto Login User (defined above) unless this checkbox is enabled. This allows you to have the Auto Login User be a user with Attended Mode access and create AutoURLs for both
attended and unattended mode stations. To temporarily get out of this mode, see Temporary Attended Mode.
If the User does not have the appropriate Security Roles for Attended Mode,
disabling this option will not put the station in Attended Mode.
- Select Events on Start: This will add the ability for a User using an Auto URL to select Events for the Check-In Suite session while maintaining other settings (above) for the Kiosk.
- Each URL that is generated includes a church specific token. All tokens issued do not expire and will be validated when Auto URL is used. If the Auto Login Configuration Settings are changed, the token will no longer be valid. If token is not valid
or not provided, an error will be displayed. The same AutoURL can be used on multiple machines/stations, if needed.
If a printer is not available in the Print Server drop-down, make sure that the Check-In Print Service is running on the appropriate machine. Under Task Manager > Background Processes, you should see CheckInManager.PrintService running. If
needed, open Check In Suite on that machine, and from the Home screen install and/or verify the
Print Service.
Note: For most uses of the Auto URL, you will want to ensure that the Home Settings for Events has Events selected for "All Events" in a selection of Ministries or a specific Ministry so that the link is dynamic from week to week and
will not need to be recreated.
Home Screen Shortcuts
Windows Station (Any Browser)
- From the Check-In Kiosk Settings screen, set the desired Settings.
- Click the Copy icon next to the AutoURL field.
- Right-click on any empty area on your desktop.
- Click New.
- Click Shortcut.
- Paste the Auto URL into the field that says "Type the location of the item".
- Click Next.
- Name the Shortcut.
- Click Finish.
Note: Because of the length of the AutoURL, you may need to create the shortcut and then right-click again to edit the Properties to add the complete URL. The URL may be truncated when first creating the shortcut.
iPad (Safari Browser)
- From the Check-In Kiosk Search screen, tap the Push icon (upward-pointing arrow coming out of a box).
- Tap Add to Home Screen.
- Tap Add.
- From the Home screen, tap the shortcut icon to launch Check-In Kiosk.
- Tap Settings.
- Set the desired Settings.
- Tap Save.
