Initial Setup
A SPoC must complete one-time initial setup to ensure the Add Family process goes smoothly.
Go to Administration > Configuration Settings and update the following settings as desired:
- COMMON, defaultParticipantType: the Participant Type given to any new individual added.
- COMMON, State: determines the state abbreviation that's defaulted for any address entry in the system.
If a Group is selected, the Group Role assigned with be the Group Role defined in that Groups' Group Type record.
Adding a Family
You can quickly add new people and families to or edit people and families in MinistryPlatform via Check-In Kiosk. This process automatically adds the information to MinistryPlatform and allows them to check into your event.:
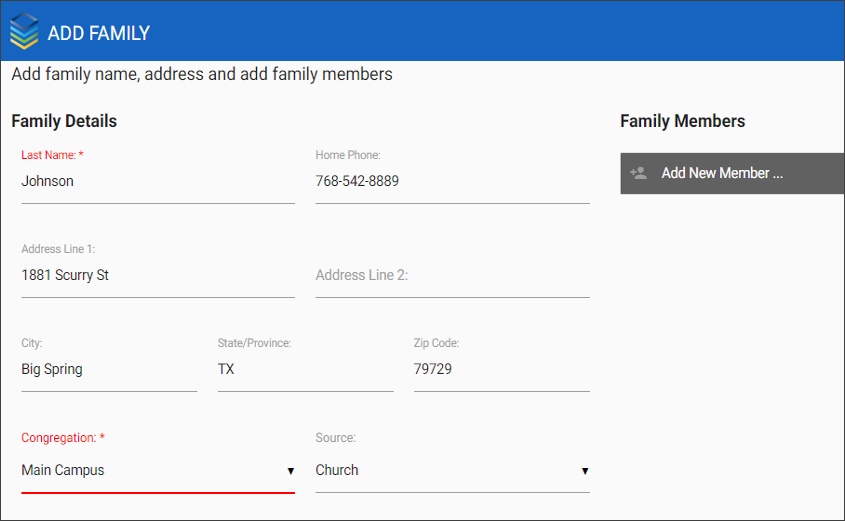
- At a workstation in Attended Mode (or Unattended Mode using the Attendant Password), click Add Family.
- Add the basic family information; this fills in the Household record of MinistryPlatform. Required fields are indicated with an asterisk (*). Only active congregations will appear in drop-down menu. The Household record's Audit Log will show the date the record was created by Check-In Suite.
- Click Add New Member and enter individual-specific information about one of the family members; this fills in the Contact record of MinistryPlatform. The Contact record's Audit Log will show the date the record was created by Check-In Suite.
- For the family members that should be able to check-in (e.g., the child for a Children's Ministry event), select an Event in the Add Event dropdown. In order for an Event to appear in the dropdown it must be selected on the Check-In Suite Homepage.
- For the family members that should be in a Group (e.g., the child in order to be in a secure Children's Ministry group), indicate the appropriate Group. This will create a Group Participant record.
- For Attributes, select the Attribute from the drop down, add a note and click +Add. Repeat as needed.
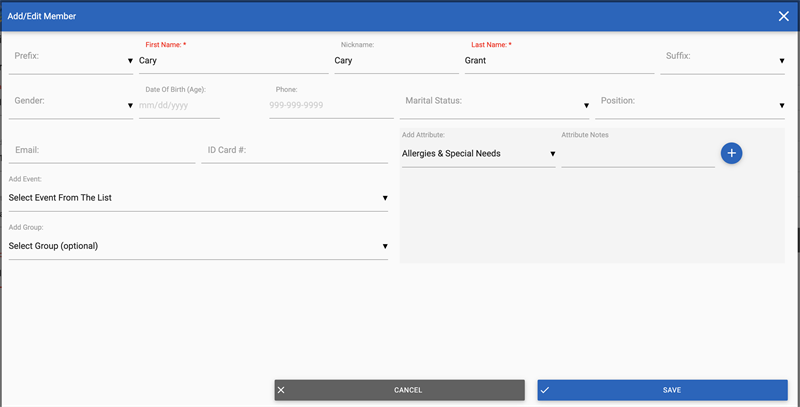
- Click Save.
- Once you've added all family members, click Save on the Add Family screen.
Editing a Family
You can quickly edit a family via Check-In Kiosk. (e.g., update contact info, add a family member) This process automatically updates MinistryPlatform and allows the newly-updated information to be used in Check-In Suite immediately.
- At a workstation in Attended Mode (or Unattended Mode using the Attendant Password), search for the desired family.
- Click Edit Family.
- Make the desired changes to the contact information, Congregation or Source. The Household record's Audit Log will show these changes.
- To edit a specific family member, click the desired family member and edit as needed. To add a new family member, click Add New Member.
- For the family members that should be able to check-in (e.g., the child for a Children's Ministry event), select an Event in the Add Event dropdown. In order for an Event to appear in the dropdown it must be selected on the Check-In Suite Homepage.
- For the family members that should be in a Group (e.g., the child in order to be in a secure Children's Ministry group), indicate the appropriate Group. This will create a Group Participant record.
- For Attributes,
- Edit an existing Attribute by selecting the Add Attribute drop-down and making any desired changes to the Attribute Notes. Saving is not required.
- Remove an Attribute by clicking the trash icon
- Add a new Attribute by clicking the '+ Add Attribute' and completing the Attribute Type and Notes. No saving is required.
- Repeat as needed.
- Click Save.
Note: Children's ages will appear in months in Check-in Suite until the child reaches 2 years old or 24 months.
Add to Group
You can use Check-In Kiosk to add someone to a Group via the Add Family or Edit Family functionality in Attended Mode. Any new child must be added to a Group to ensure Security Name Tags print for them.
When adding someone to a Group, keep the following in mind:
- It is necessary to first select the Event in order to get the list of specific Groups available to that Event.
- A Group Participant record will be created with a Group Role of the Default Group Role set on the Group Type record in the Platform.
- If you added a Date of Birth prior to indicating an Add to Group, the Check-In Suite attempts to prioritize Group options by sorting the best match to the top, by comparing the Date of Birth provided with the Age in Months to Promote on the Group record.
- The person is added to the Group with today's date as their Group Participant Start Date, and they are given the Group Role indicated in the initial setup.
- You cannot remove someone from a Group or edit their Group Participation via Check-In Suite. These actions can only be completed via MinistryPlatform or the Portal. As an alternate option, you could indicate a need for a Group update via a Family Care Note.
